How to Create a Project in Claude?
Created with Trainn AI
Here's a step-by-step walkthrough on how to create a project in Claude
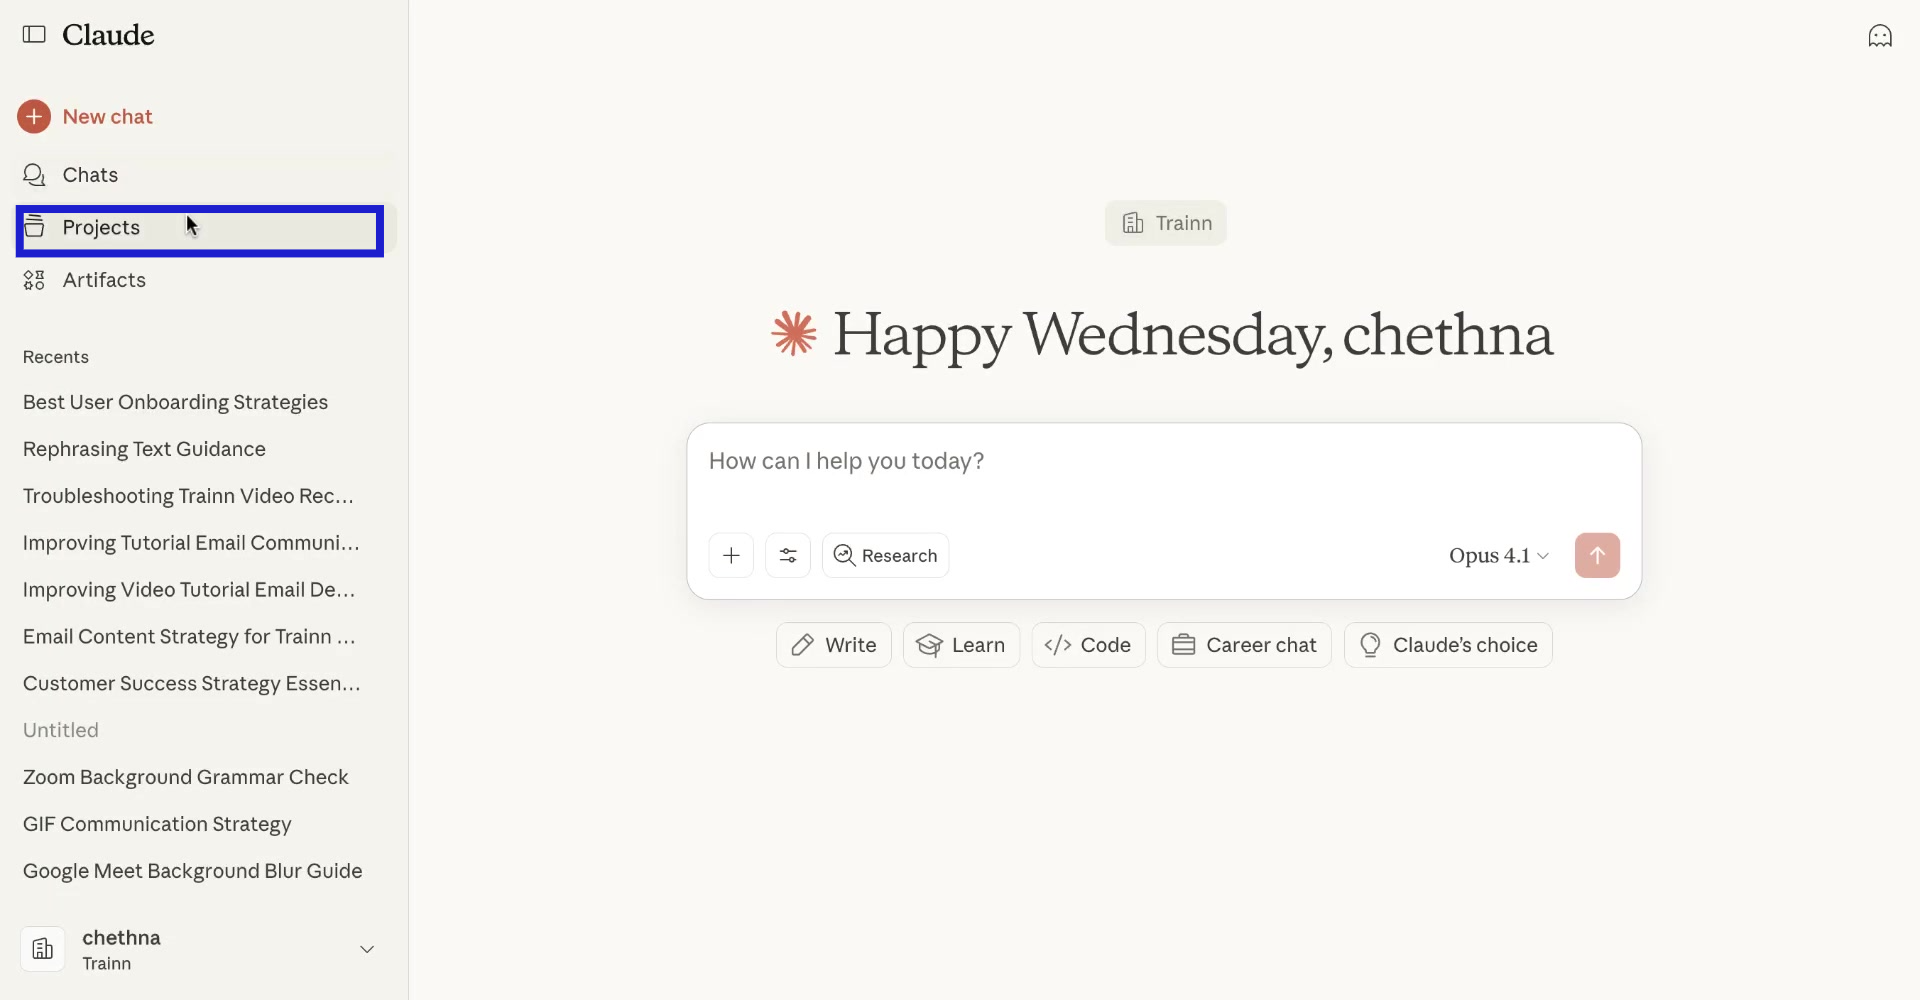
1. Click on "Projects".
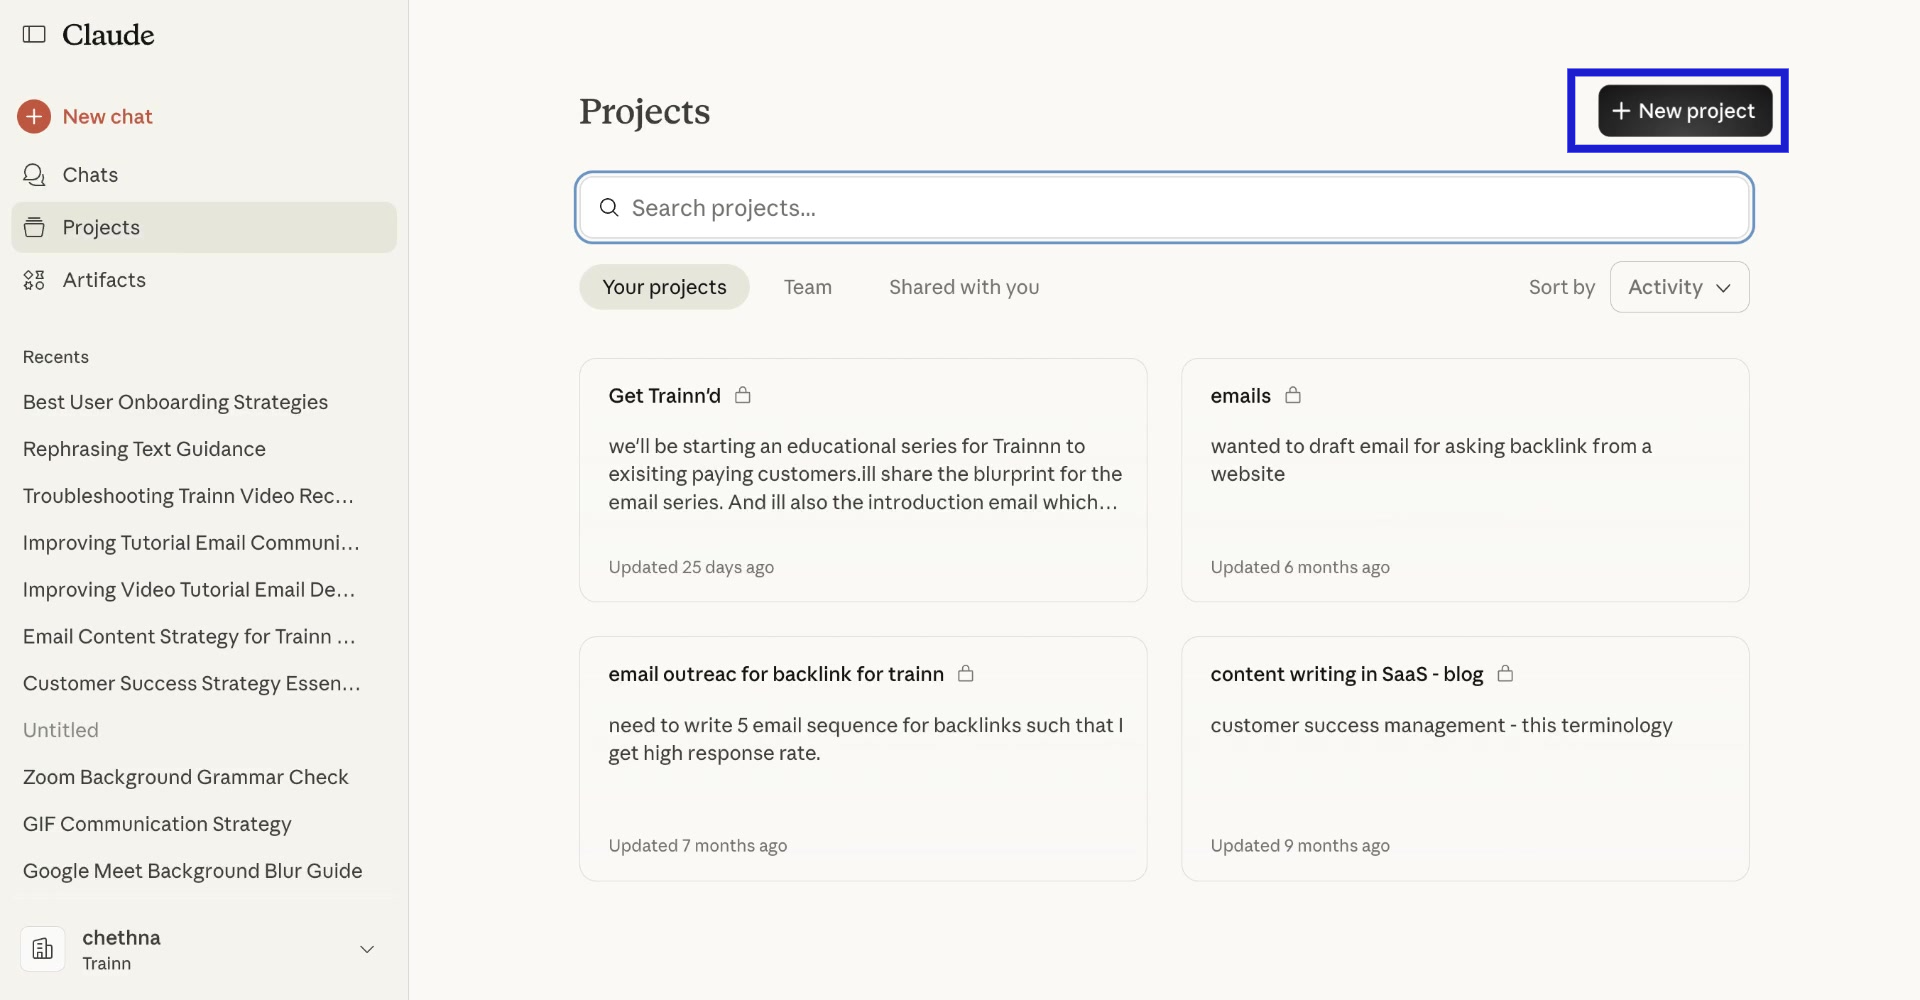
2. Click on "New project".
3. Enter a name for this project.
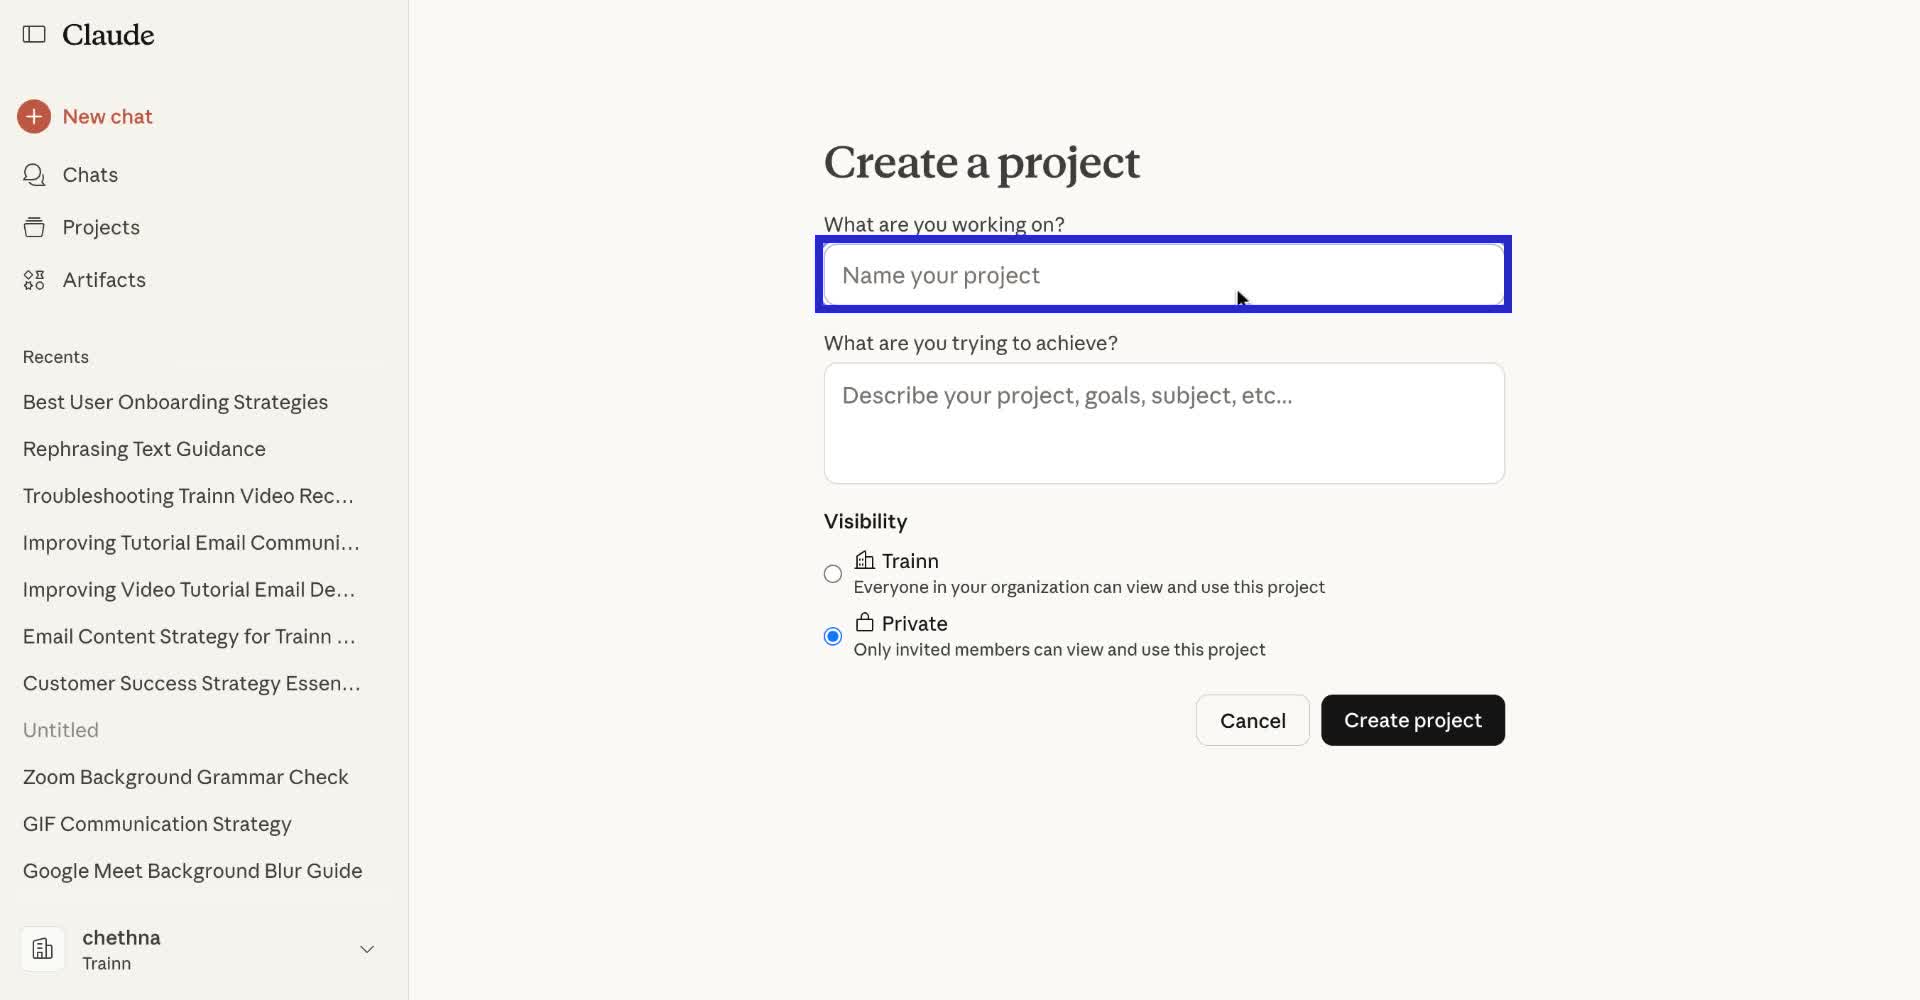
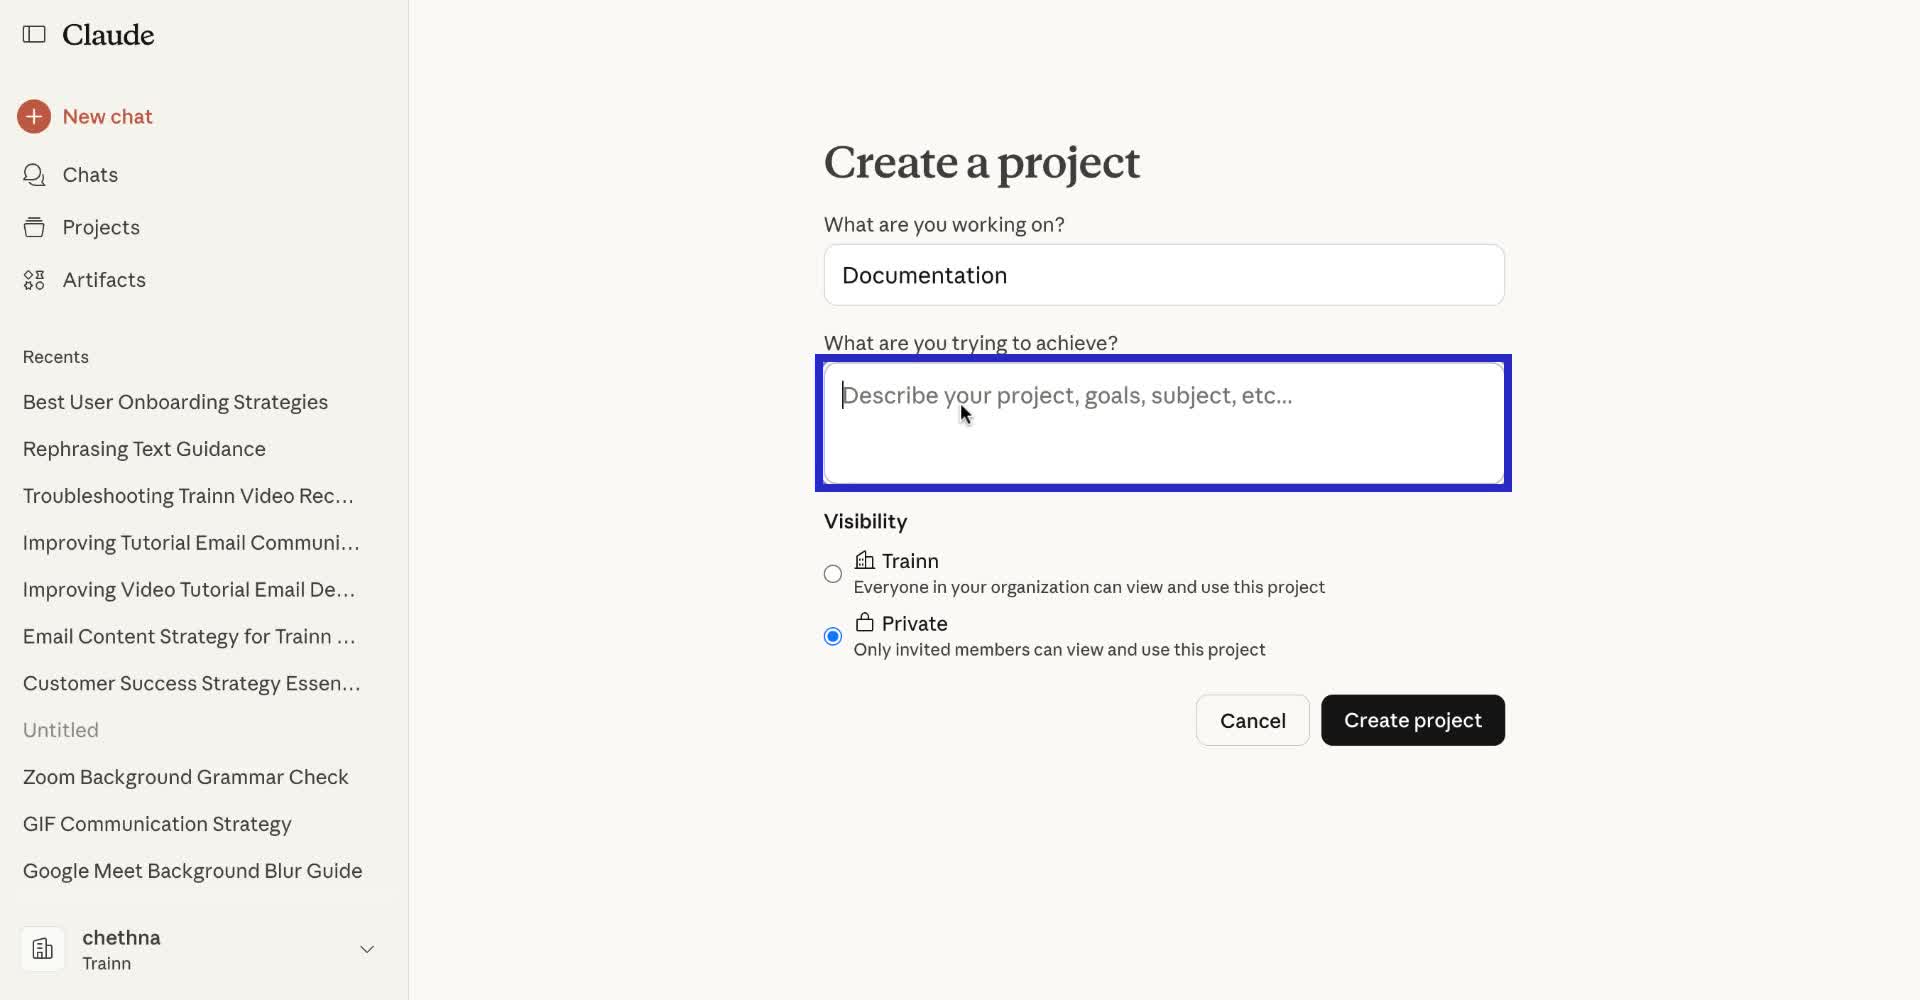
4. Enter the project description - objectives, goals, and more.
5. Select whether this project should be visible only to you or within your organization.
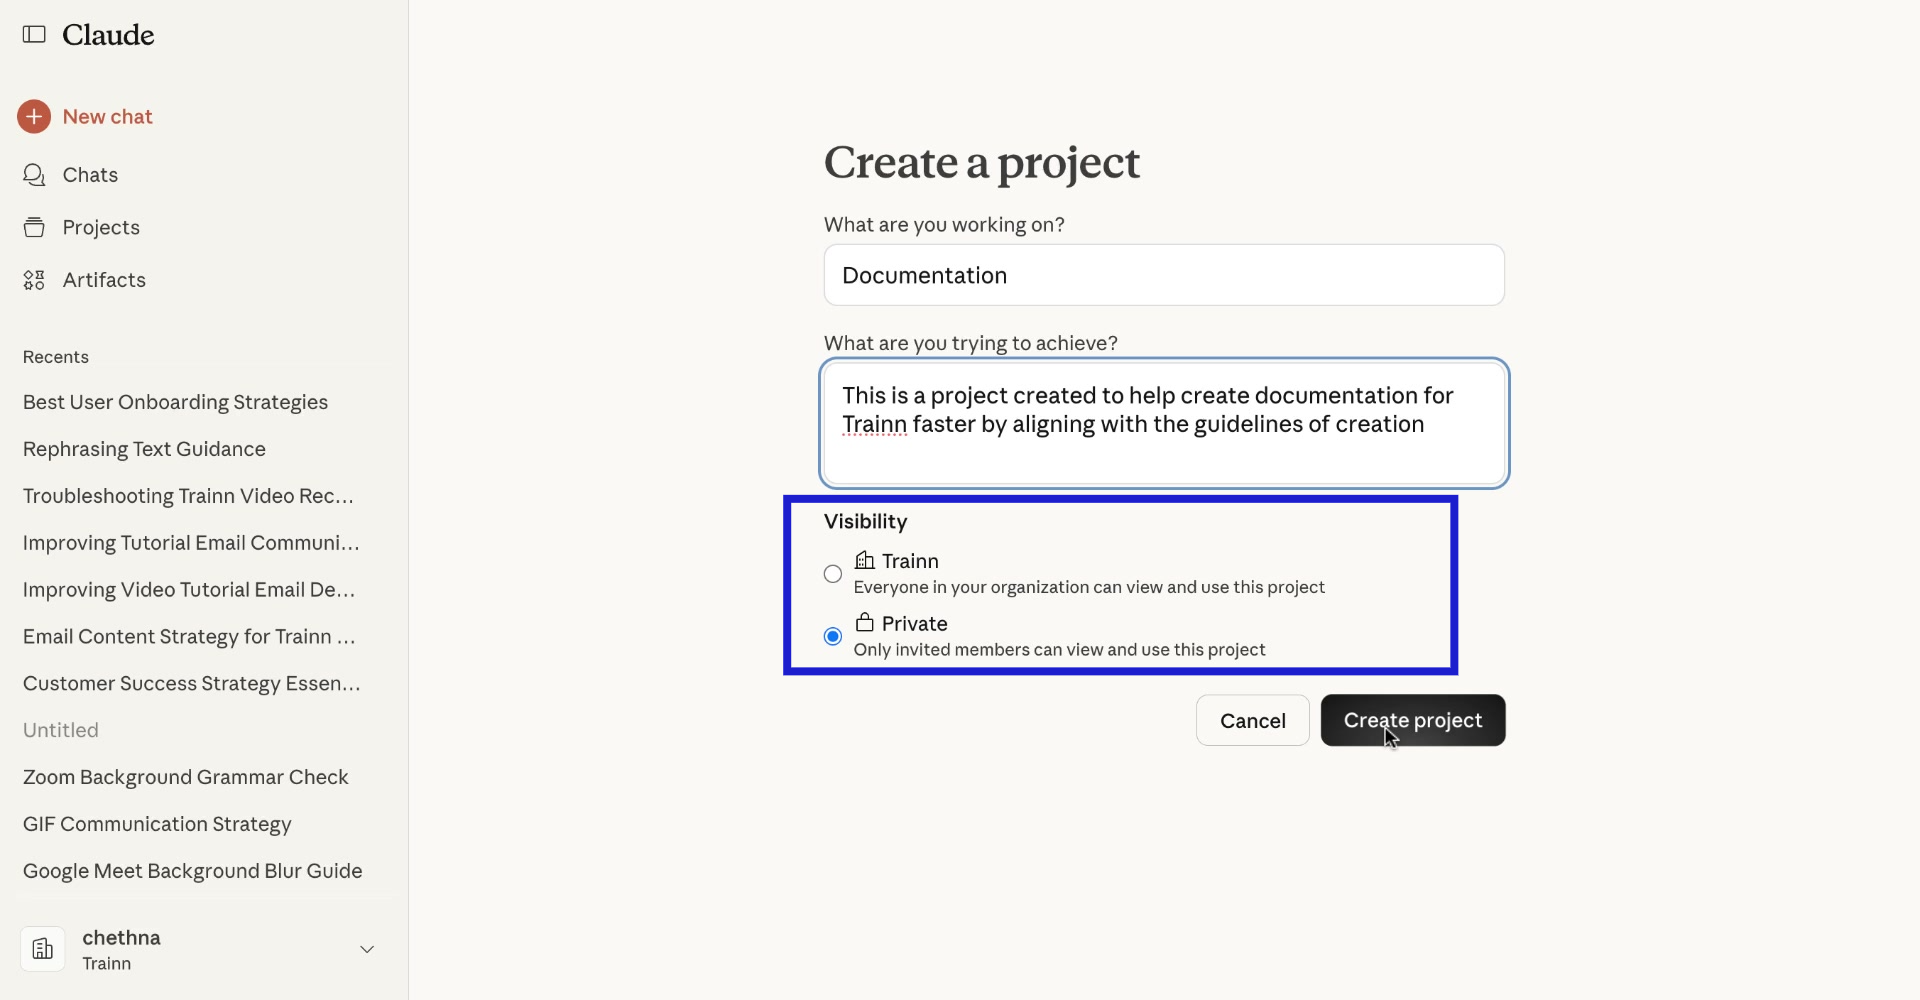
6. Click "Create project" to proceed creating project.

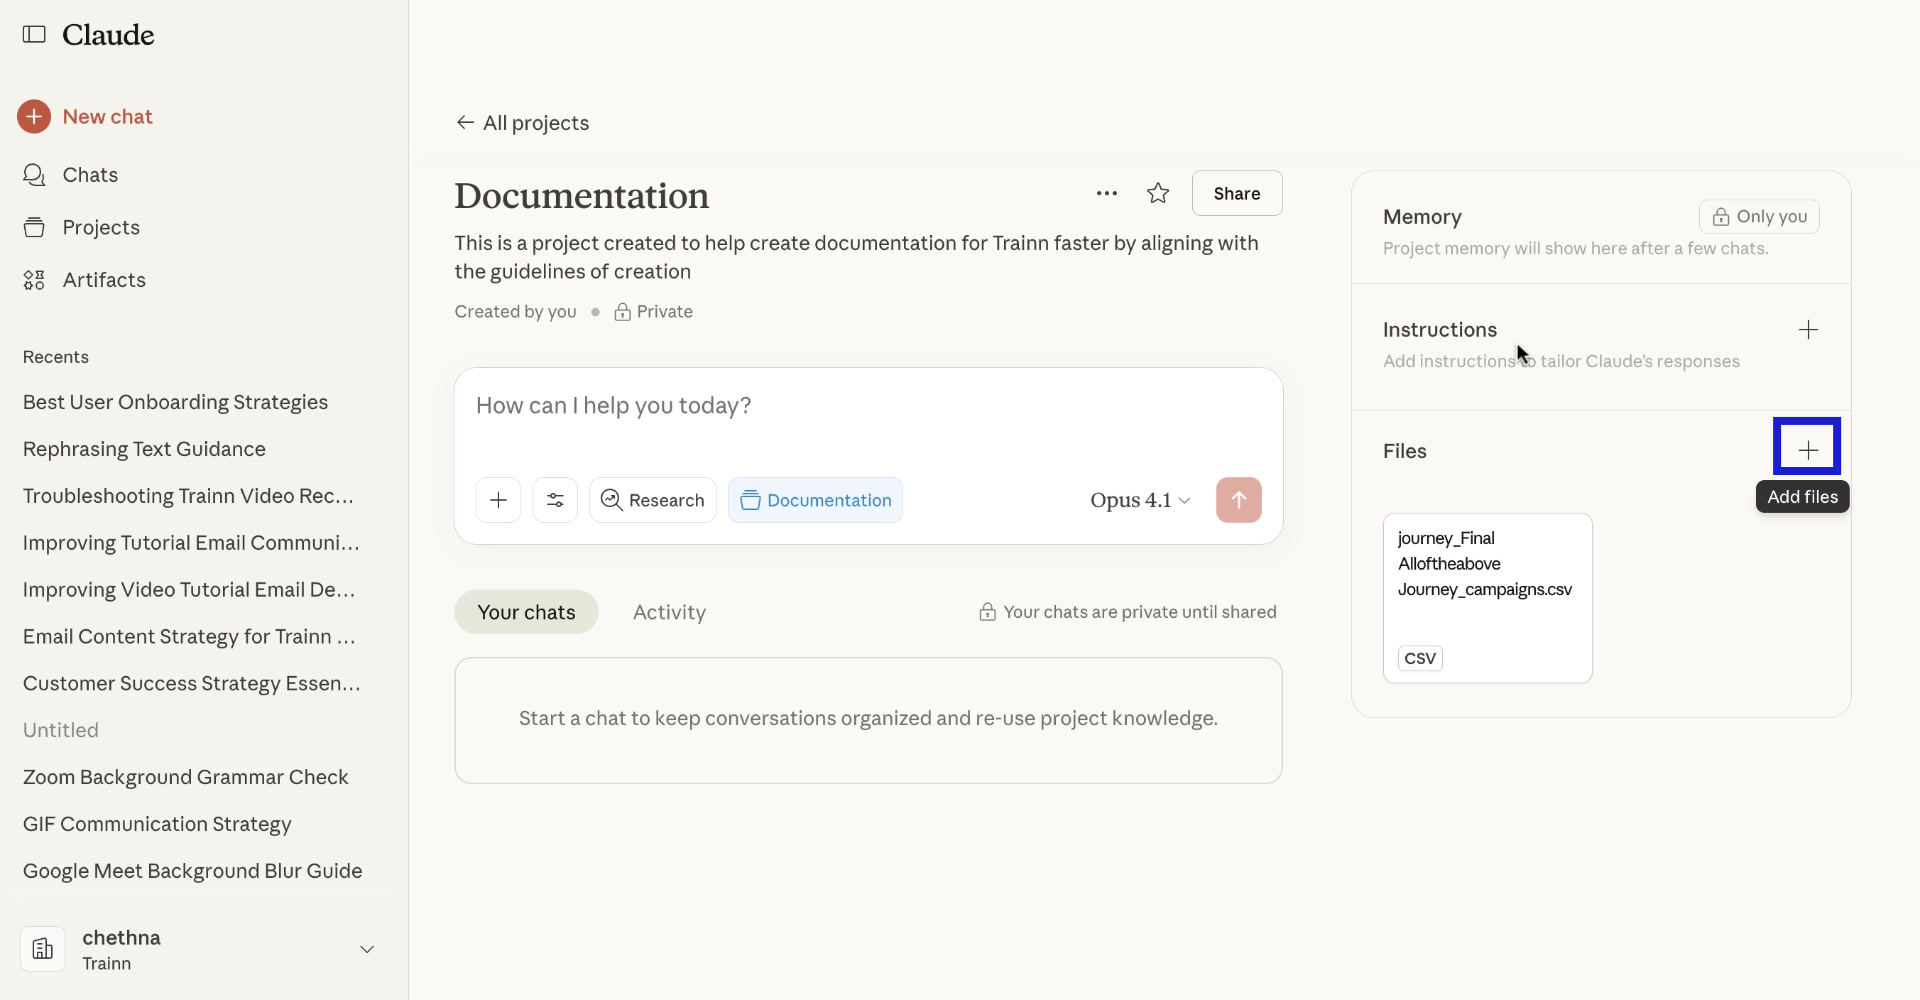
7. Click the "Plus" icon under Files to upload any files for reference.
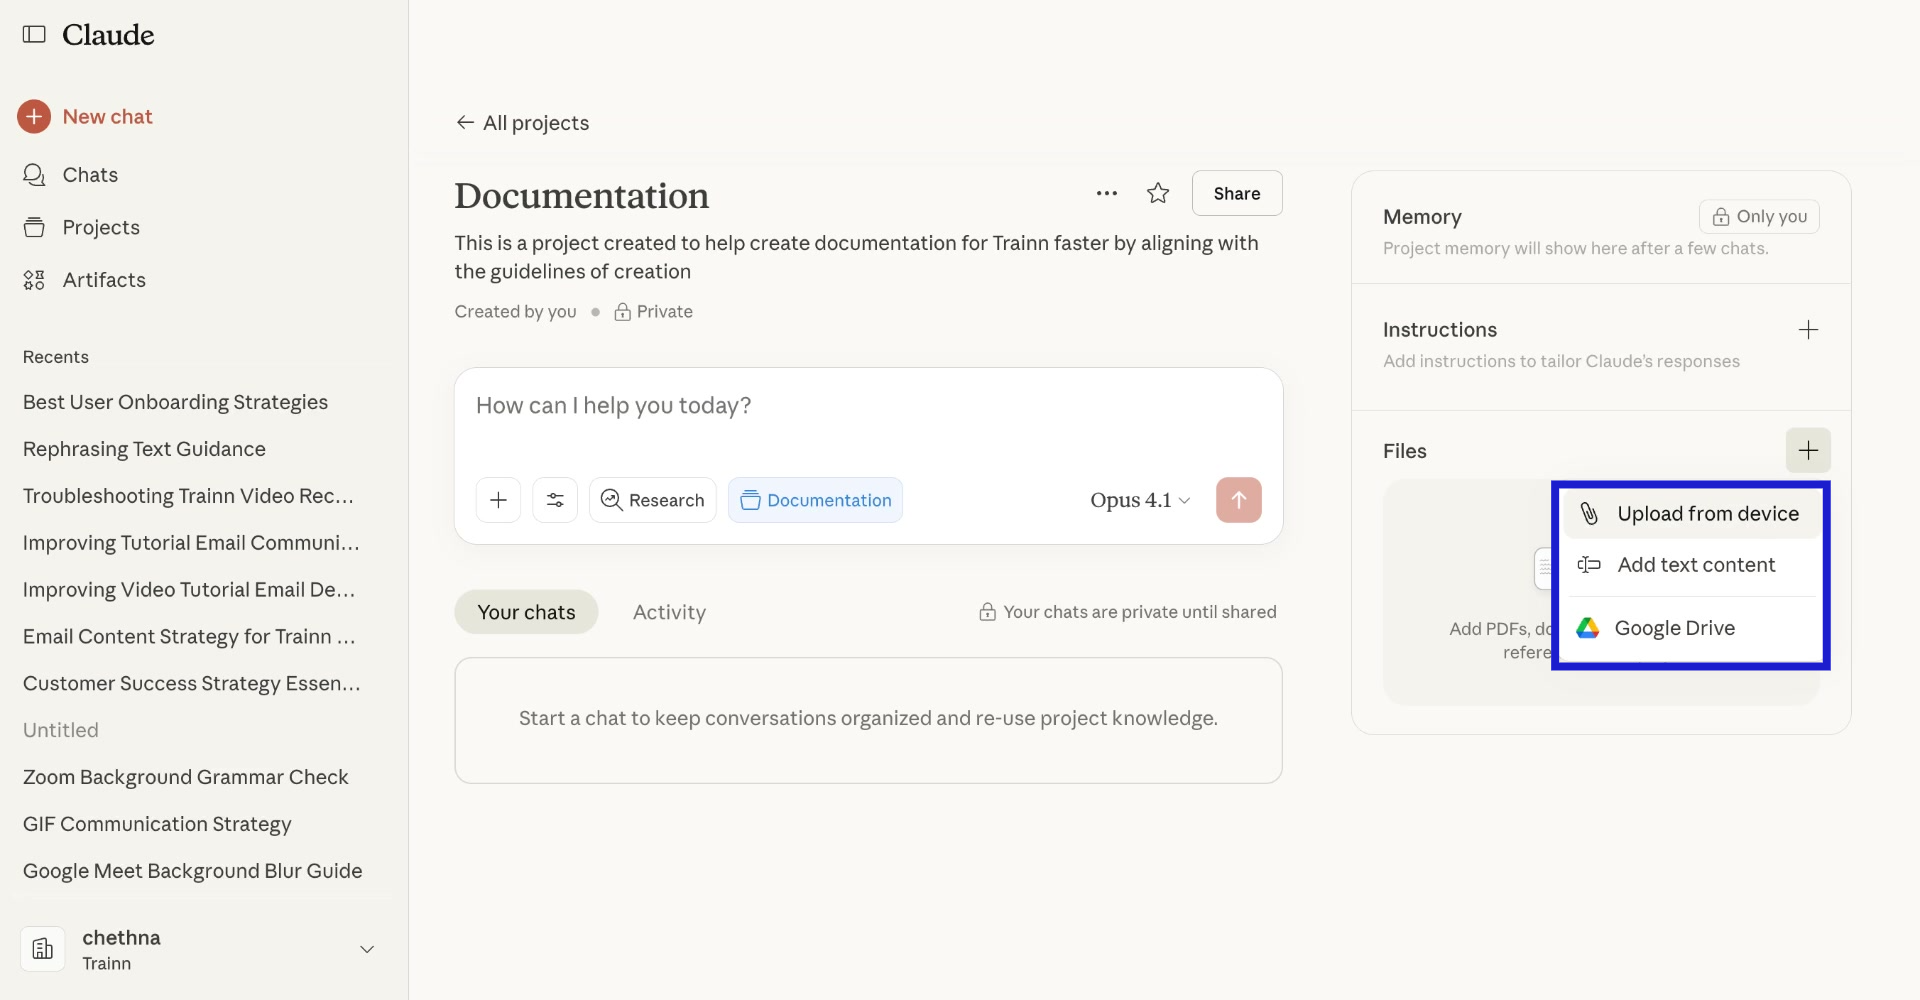
8. Select your desired option to upload the files.
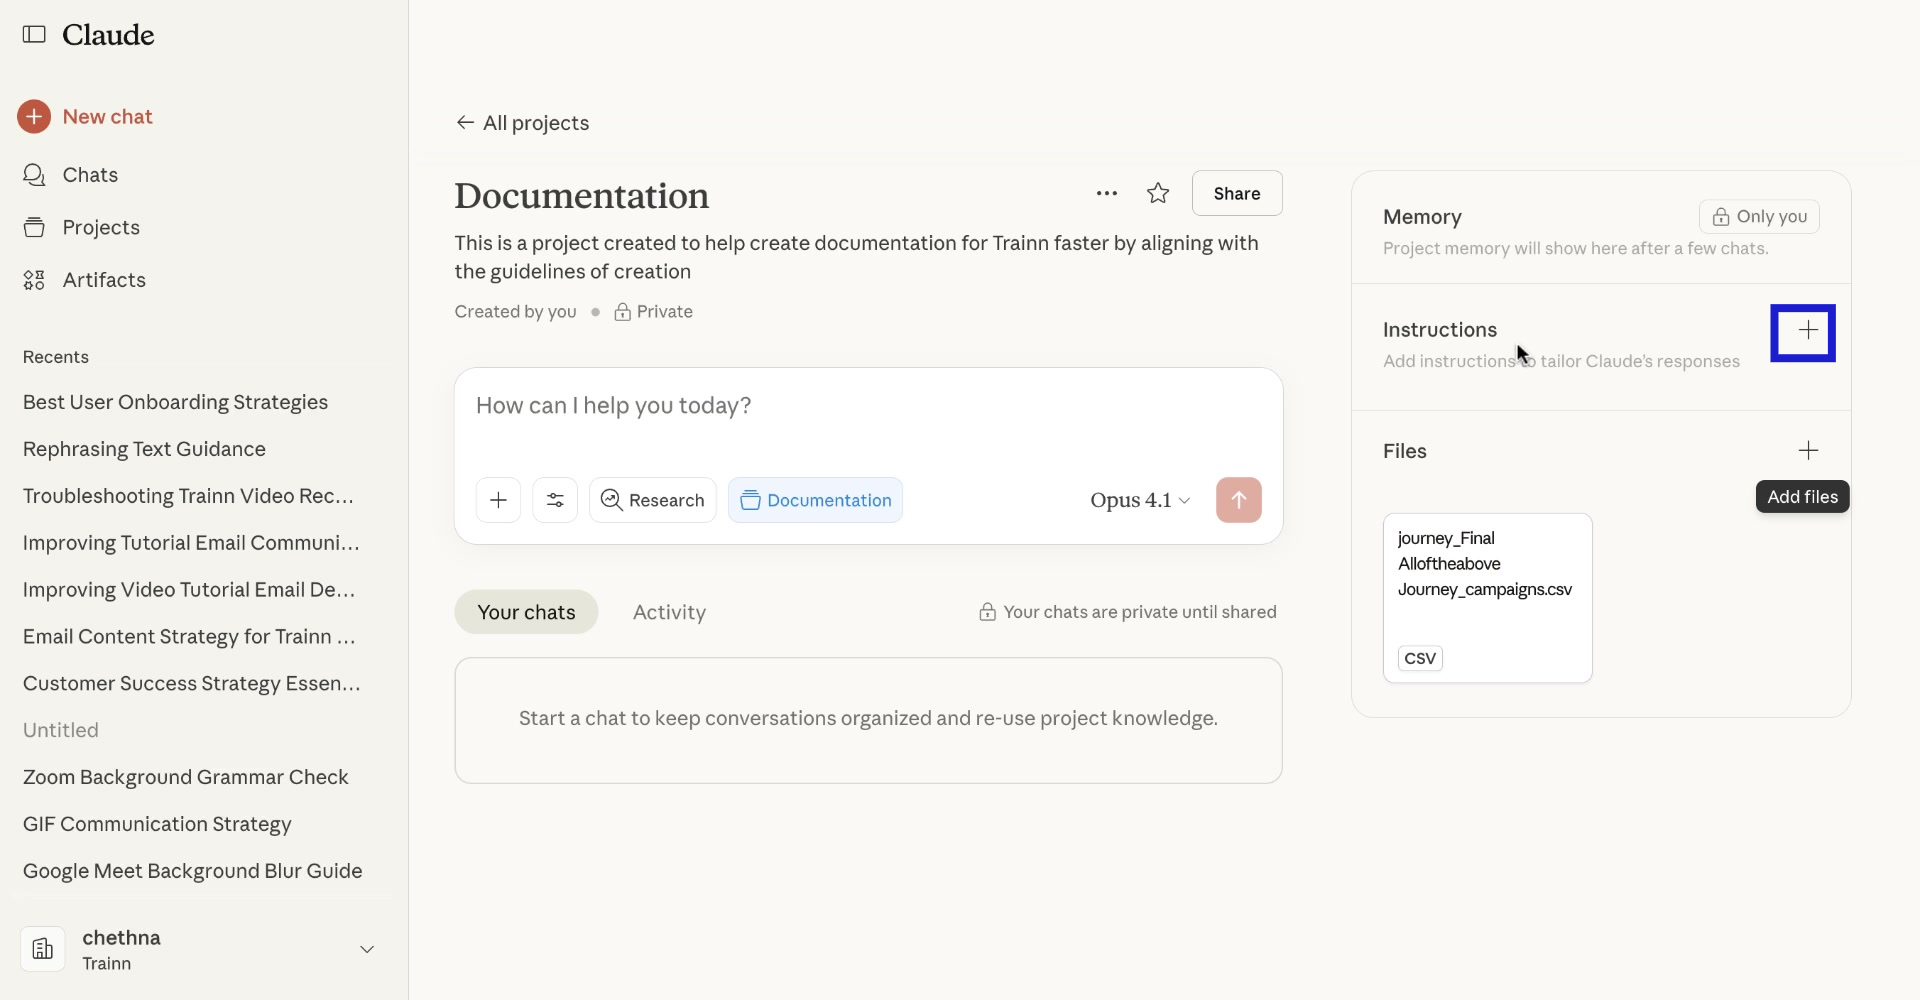
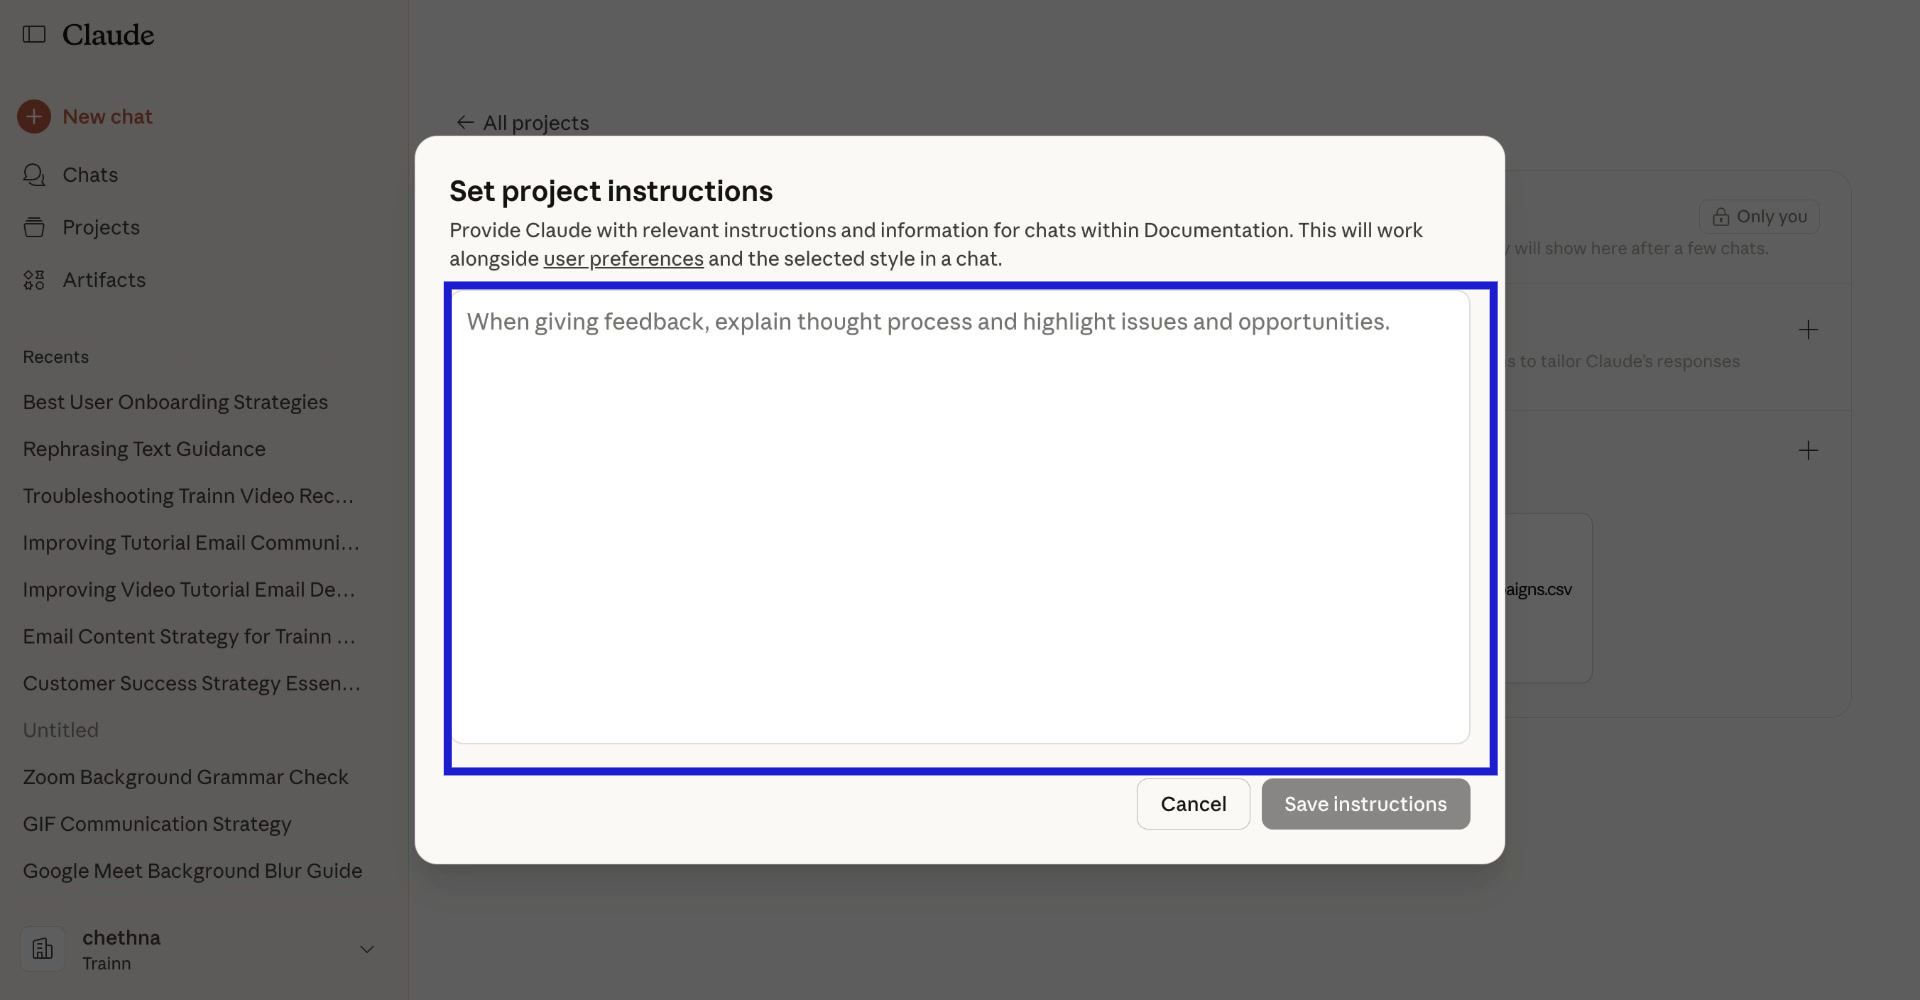
9. Click the "Plus" icon under "Instructions" to add new instructions.
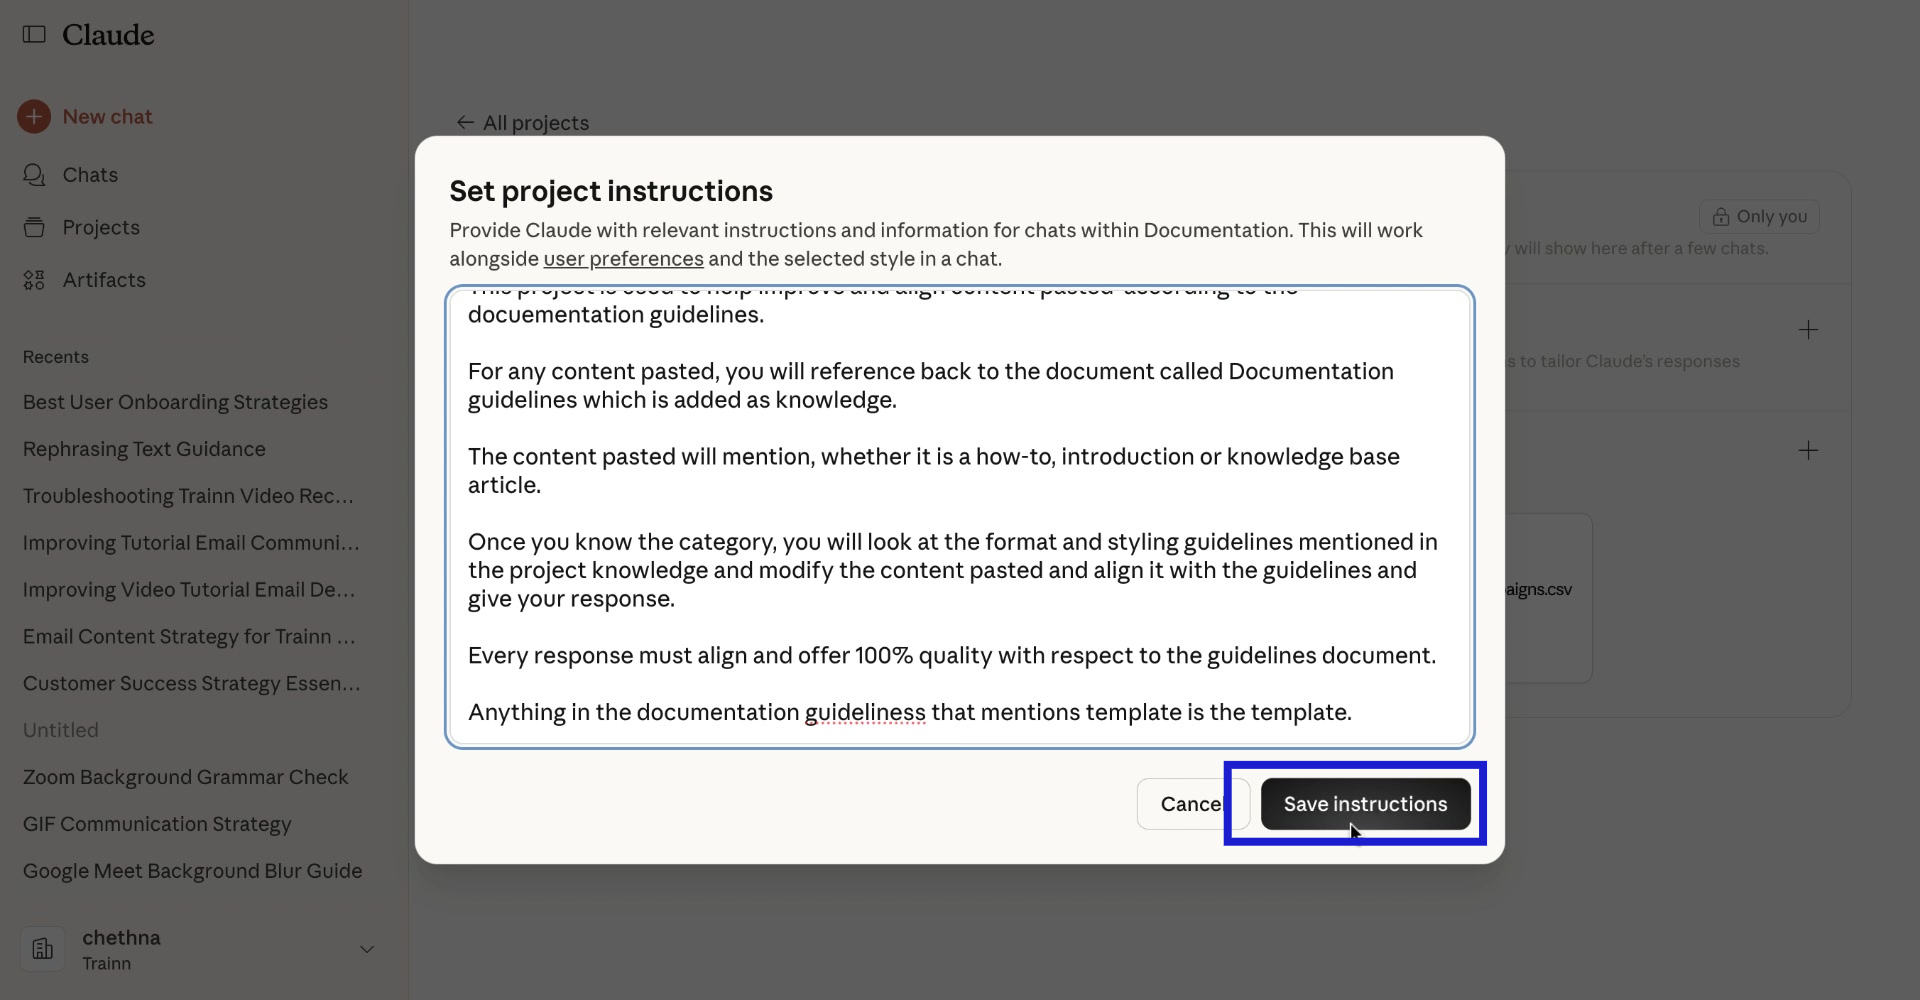
10. Provide any instruction in the provided field.
11. Click "Save instructions".
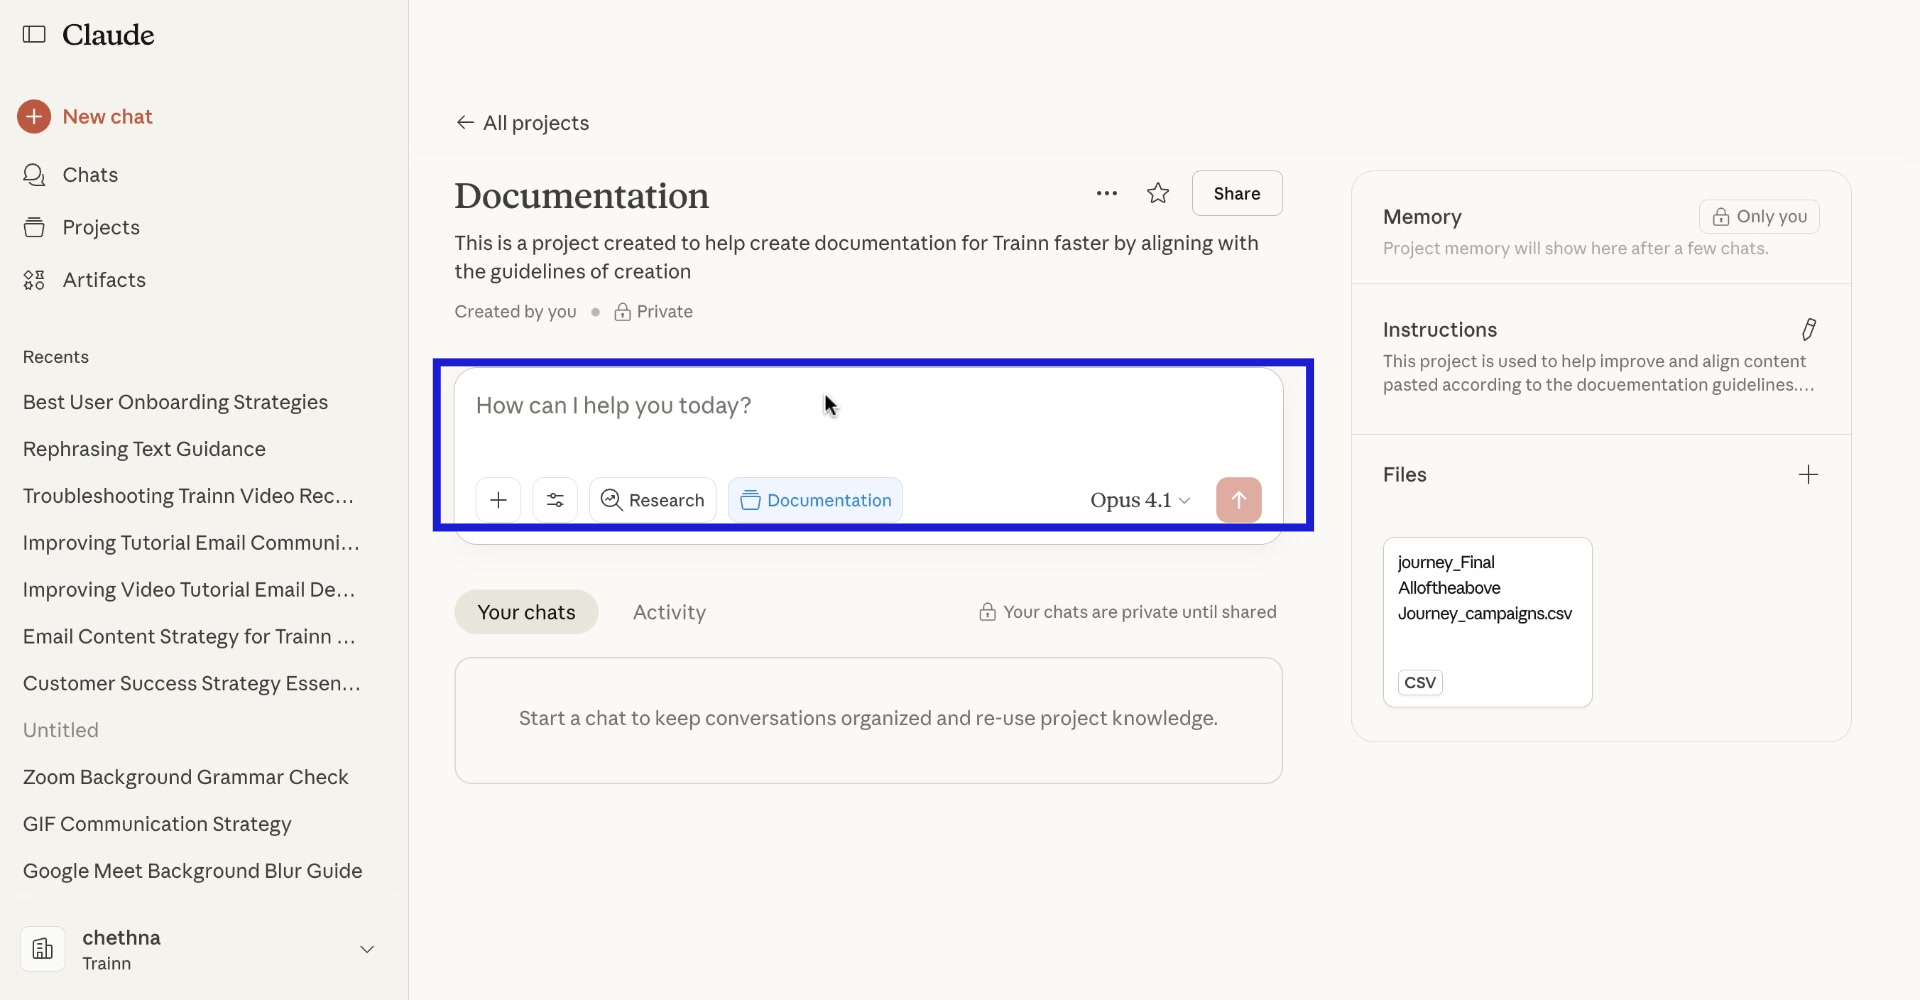
12. You can start asking query in this project.
Awesome! You've successfully created a project in Claude!
Trainn is a customer education platform for SaaS companies that enables customer-facing teams to create product training content-such as videos and guides-and deliver it across knowledge bases, learning management systems (LMS), and in-app experiences to support onboarding, product adoption, and customer success at scale.
North Bethesda, Maryland 20852


