
Ship Product Videos That Replace Manual Training
Create professional training videos with AI and deliver them
as in-app help or a
branded academy. Update them in minutes,
every time your product changes.
Our 1:1 training wasn't scaling with a growing customer base. With Trainn, we built the BuildOps Learning Center with 100+ training videos in 45 days. Now customers learn on their own, and our team is freed to support customers, instead of training them.

Loved by customer-obsessed teams worldwide

Our technical writers now create 15–20 videos per week for ServiceNow's documentation portal. With Trainn, we have cut video production time by 50%.
Sr. Manager, Strategic Programs
read more
Buildops created 100+ training videos in 45 days using Trainn. Customers now self-serve 24/7 with the BuildOps Learning Center, freeing implementation team from hours of repetitive training.
read more

Trainn solved our biggest pain point — customer education at scale. We launched Webengage Academy with 75 videos in 4 weeks to train and certify talent.
read more

We replaced Loom with Trainn, and launched The SpotDraft Training Academy in 45 days. Customers now prefer 3-min training videos over scheduling 1-hour calls with our team.
Customer Success Lead
read more
When a new feature is out, we just update a couple of slides on the video, push the video live in 10 minutes, and customers can benefit from the video right away. Educating 12,000 customers in real-time felt easy.
General Manager
read more
Create Customer Training
Content in Minutes
Capture any product workflow once. Trainn turns it into a video, interactive guide, and step-by-step documentation, ready to ship and easy to update.
Start creating for free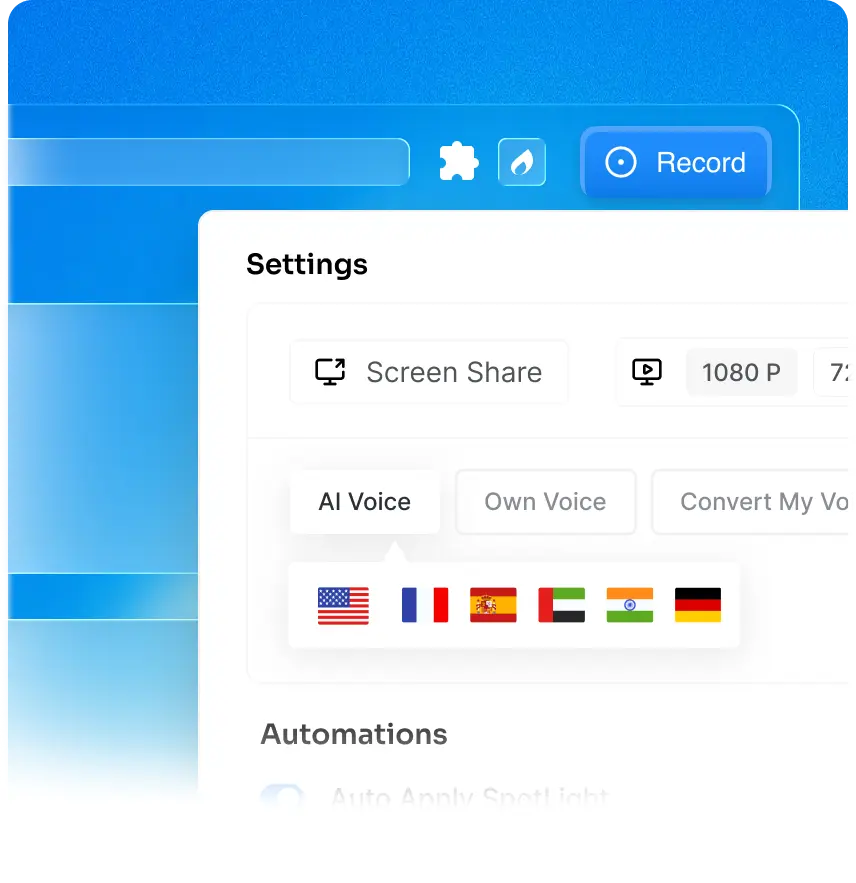
AI-Powered Video Creation
Record your screen, and Trainn automatically generates zooms, voiceovers, and spotlights — your video is ready in minutes.
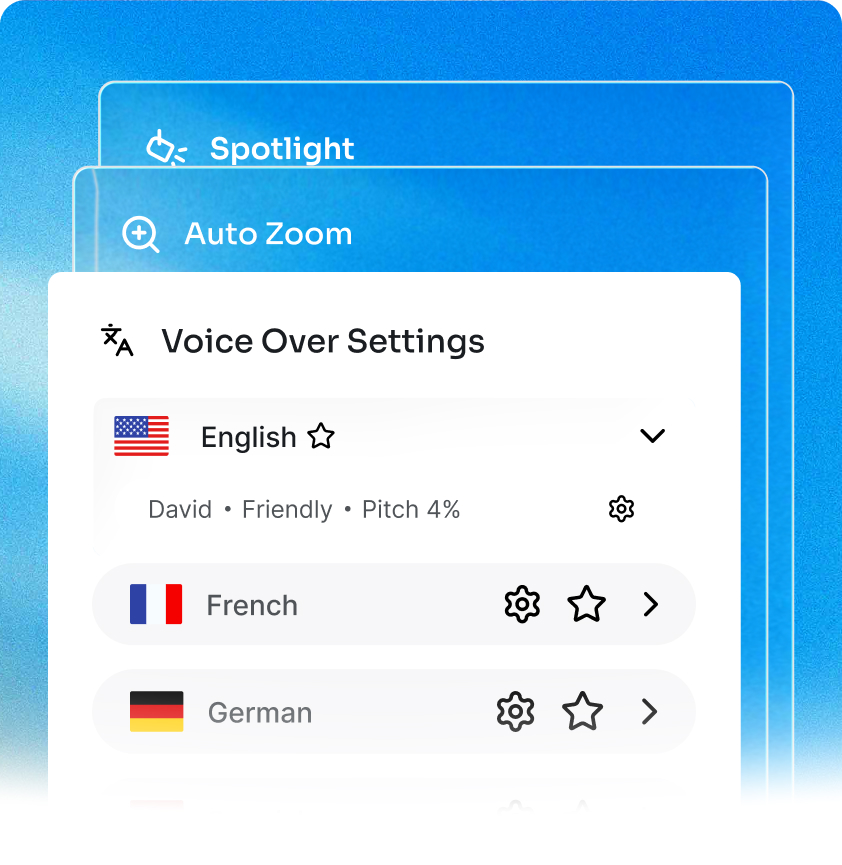
Voiceovers in 30+ Languages
Write your own script or let AI generate one. Edit voiceovers as text and translate videos into 30+ languages in one click.
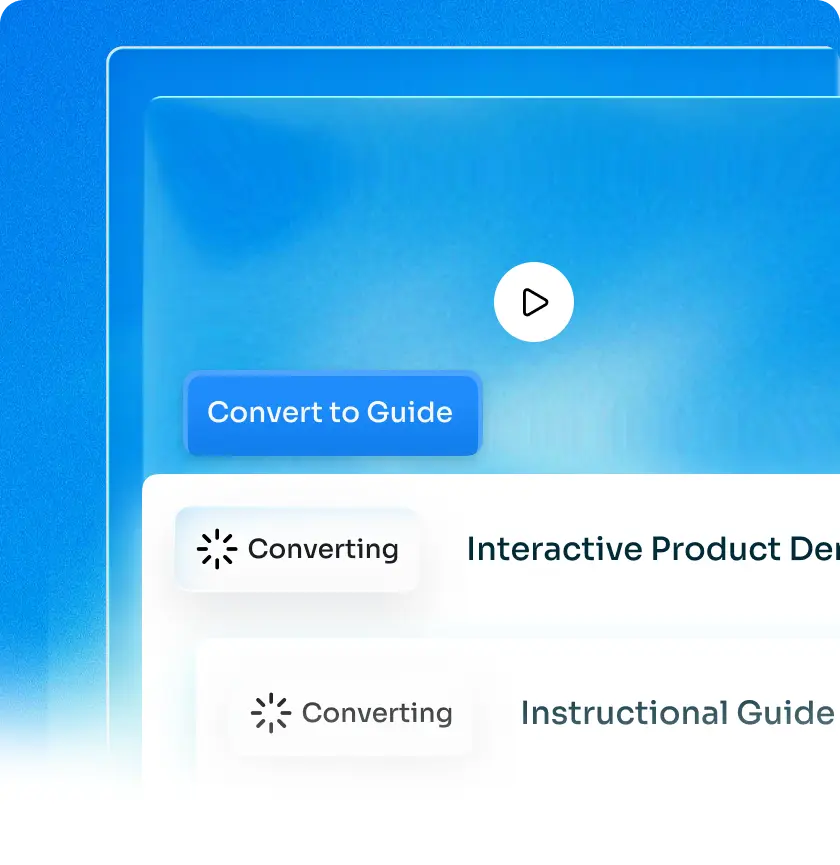
Generate Interactive Guides
Turn any video into interactive guides and step-by-step documentations with a single click.
Distribute Your Training Content at Scale
Distribute your videos and guides across your customer touchpoints. Setup in-app training, build a searchable knowledge base, or launch a branded academy — in days, not months.
Watch a video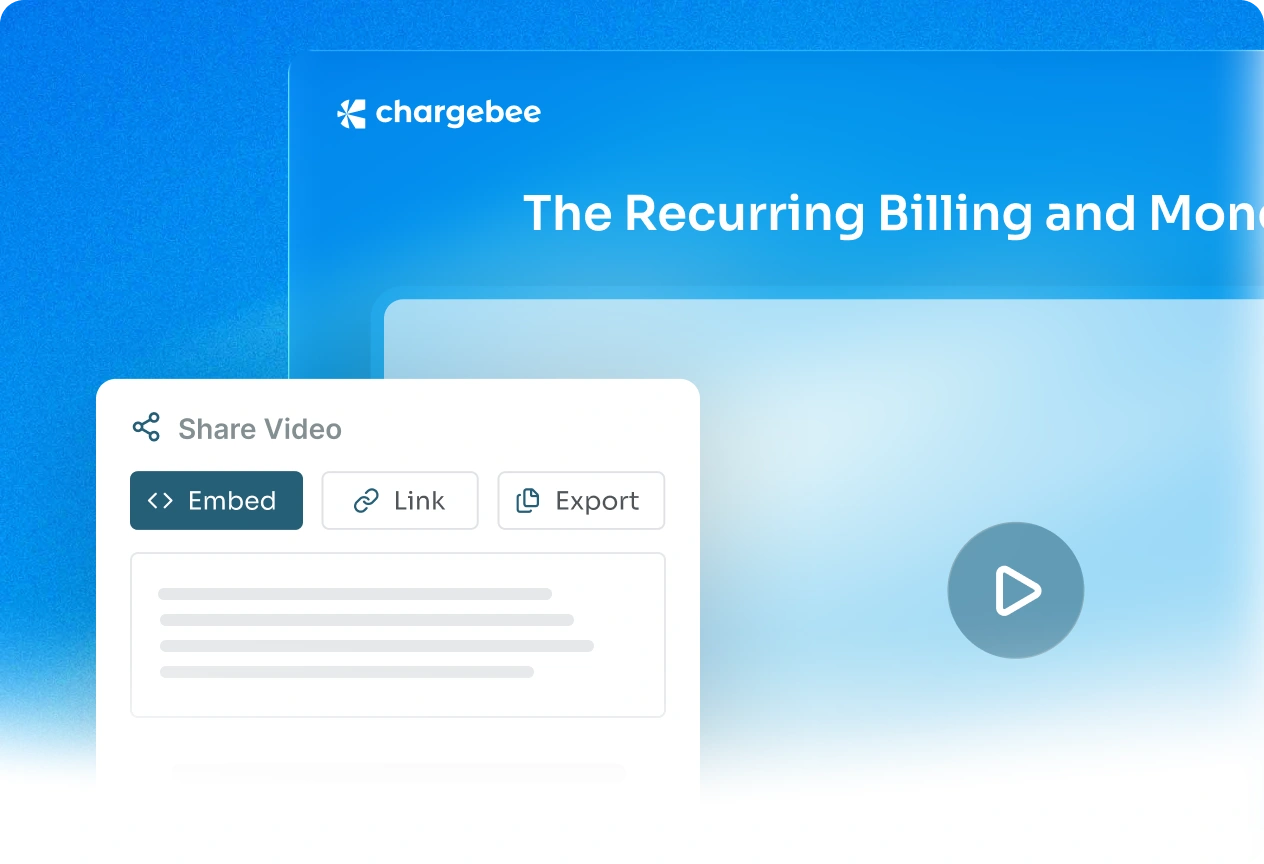
Links and Embeds
Share videos as links, or embedded content. Every update instantly reflects across every shared location, without any manual effort.
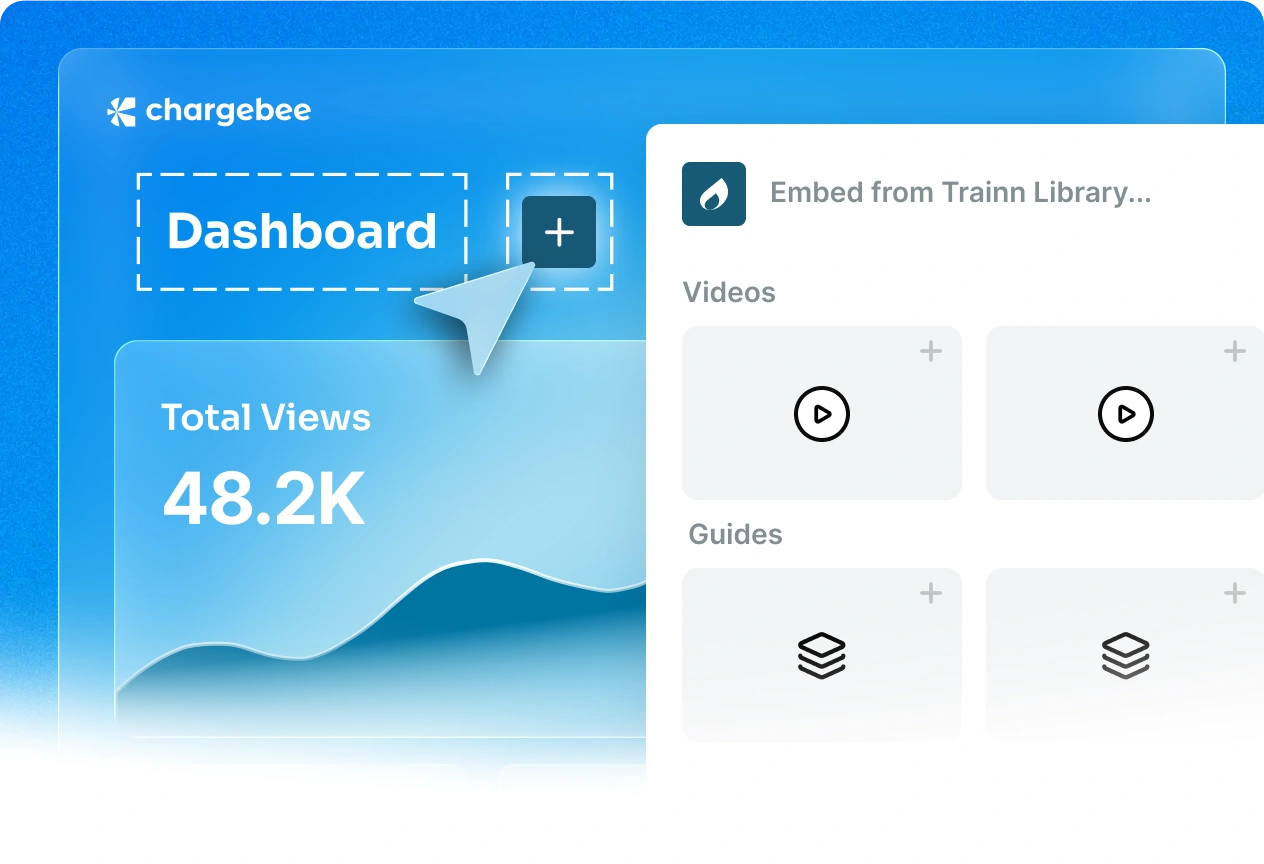
In-App Tutorials
Offer contextual help inside your product by embedding videos and guides exactly where users need them — without engineering help.
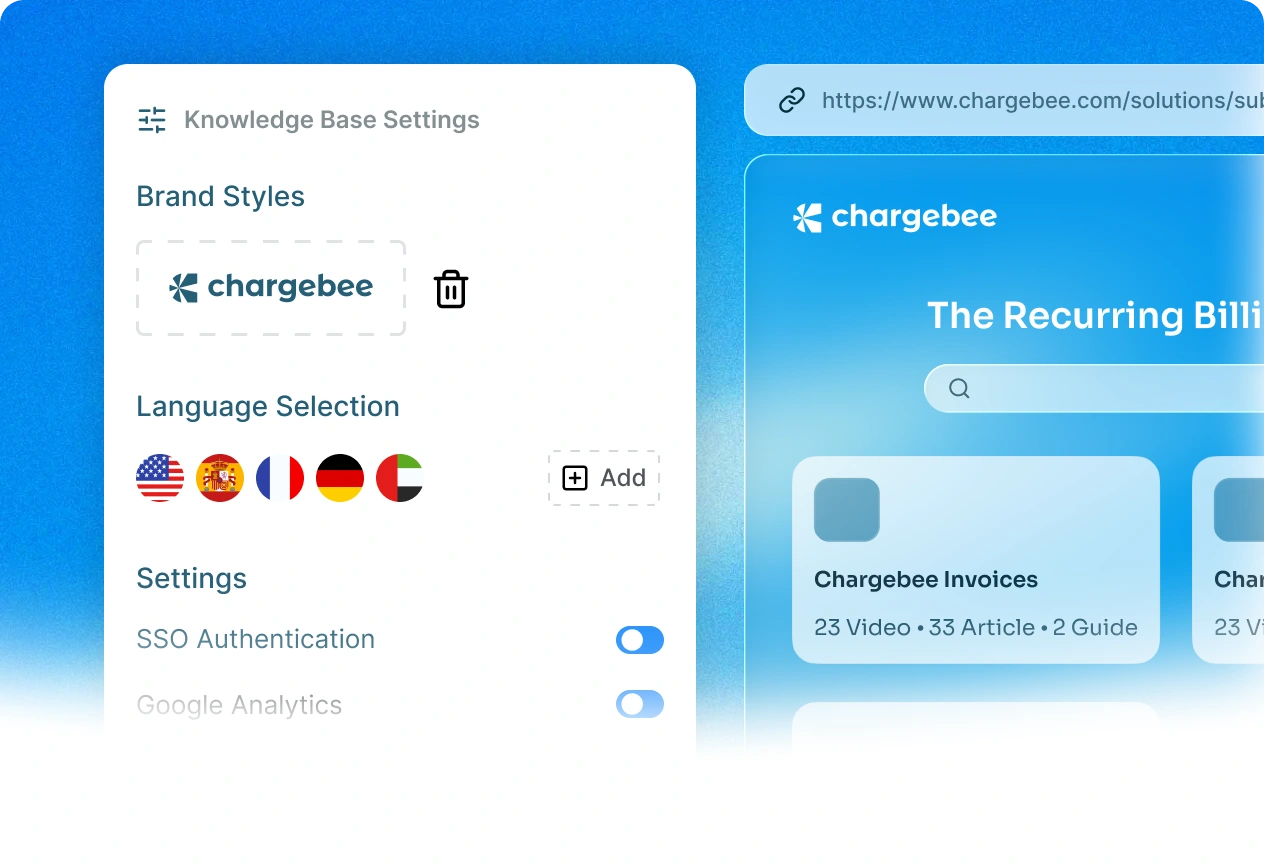
Knowledge Hub
Create a searchable knowledge base with recommended videos and training collections for your customers to self-serve.
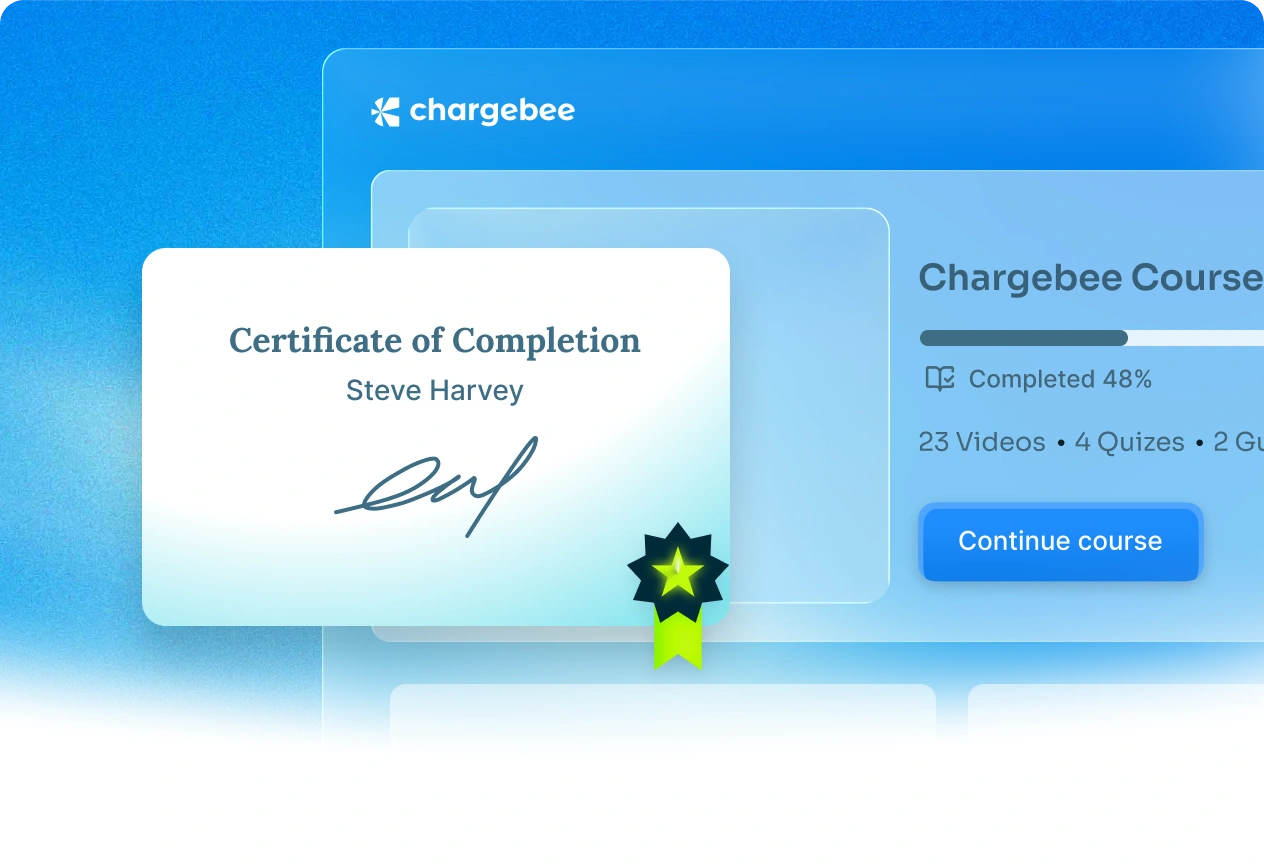
Academy (LMS)
Build a training academy to onboard and certify customers on your product with structured courses.
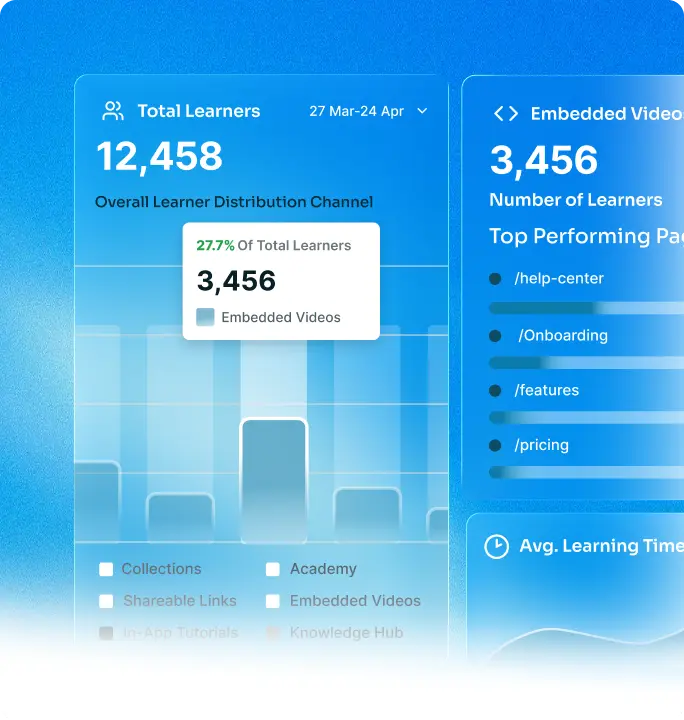
Measure Training Impact
Track how customers engage across every channel: Knowledge Hub, Academy, In-App — all from one dashboard. No spreadsheets. Just insights.
Try Trainn
Trainn for Your Team
One goal: customer training — enabled by a single platform, delivered by different teams.
Reduce 1:1 training time
Turn your repeated feature walkthroughs into self-serve training. Customers learn on their own. CSMs focus on retention.
Try Trainn for Customer SuccessReduce 1:1 training time
Turn your repeated feature walkthroughs into self-serve training. Customers learn on their own. CSMs focus on retention.
One Platform for All Your Customer Training Needs
Customer training teams use Trainn to create, deliver, and track training—without juggling multiple tools or siloed data.
One subscription. One login. One bill.

The biggest benefit for us is having
AI video creation, guides, LMS distribution, and
analytics—
all in one place.
Eldho John
Lead Business Strategist

Real Stories from Real Training Teams


Our technical writers love Trainn. It is easy, time-saving, and has a lot of advantages.
Dinesh, Senior Multimedia Producer, Servicenow
Trusted By Enterprise Companies
Technology leaders across industries use Trainn to power their customer education programs at scale.


See Trainn in Action
Explore how Trainn powers scalable, self-serve customer education for you.
Frequently asked questions
Trainn is the only no-code customer education platform that combines:
AI-powered video and guide creation
Built-in delivery via knowledge base, in-app tutorials, and training academies
Unified analytics across all content and channels
Unlike other tools that focus only on content creation or delivery, Trainn gives SaaS training teams everything they need to create, host, and scale customer education — all in one platform, without code or stitching tools together.
Trainn is a customer education platform for SaaS companies that enables customer-facing teams to create product training content-such as videos and guides-and deliver it across knowledge bases, learning management systems (LMS), and in-app experiences to support onboarding, product adoption, and customer success at scale.
North Bethesda, Maryland 20852


