
- Features
- Resources
- Pricing
- Try Trainn's AI Video Agent


Product
Usecases
Resources
Case Studies
Company
- Customers
- Pricing
- Try Trainn's AI Video Agent
- Expert voices
- Log in
- Book a demo
- Sign up →
Published on: 26 Apr , 2023
How to Make a Product Demo Video in Six Steps
On this page
Recording a product demo takes about 90 seconds. Everything after you press stop is where the hours go. Writing the script, recording voiceover, cutting the timeline, placing zooms, syncing audio to frame, then applying brand styles.
That gap is why demo videos sit unfinished. It is also why the person who knows the product best is rarely the person who ships the video.
By the end of this guide you will have one published product demo video, plus a written guide built from the same recording. It is written for software teams recording a screen, not for anyone filming a physical product. Budget about 30 minutes of working time for a 90-second demo once your demo account is ready.
Key takeaways
- Six steps, in order: pick one workflow, write a light script (or skip it), set up a clean environment, record, add a voiceover, and edit.
- Recording is the easy part. The editing after you hit stop is where most demos stall.
- One video, one job. Keep it to a single workflow and outcome, and split anything bigger into more than one video.
- Aim for under two minutes. Open on the outcome, and end on a single call to action.
- Skip the manual editing. An AI video and guide creation tool can do about 95% of the production, so a product expert can publish without a video editor.
What You Need Before You Start
- A demo account with realistic data, kept separate from any live customer account
- A screen recorder. Browser-based works for web products; desktop capture for installed software
- One workflow you can perform without stopping to think
- Roughly 30 uninterrupted minutes
You do not need a camera, a microphone, lighting, or a finished script. That advice comes from physical product video production and does not apply here.
Step 1: Scope the Demo to One Job
Write one sentence in this shape: by the end, the viewer can do one specific thing. If the sentence needs the word "and," you have two videos.
"By the end, the viewer can build and share a custom report" is one job. "By the end, the viewer understands our reporting module" is a tour, and tours lose people early.
Name the payoff screen before you go further. If you cannot point to the single screen where the outcome appears, the scope is still too wide.
Length follows scope. Wistia's 2026 State of Video Report found educational video earns the highest engagement of any type. It also found viewers watch roughly half of a video under one minute. Put the payoff early either way.
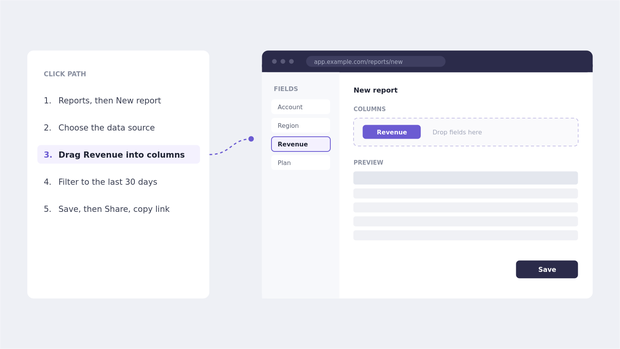
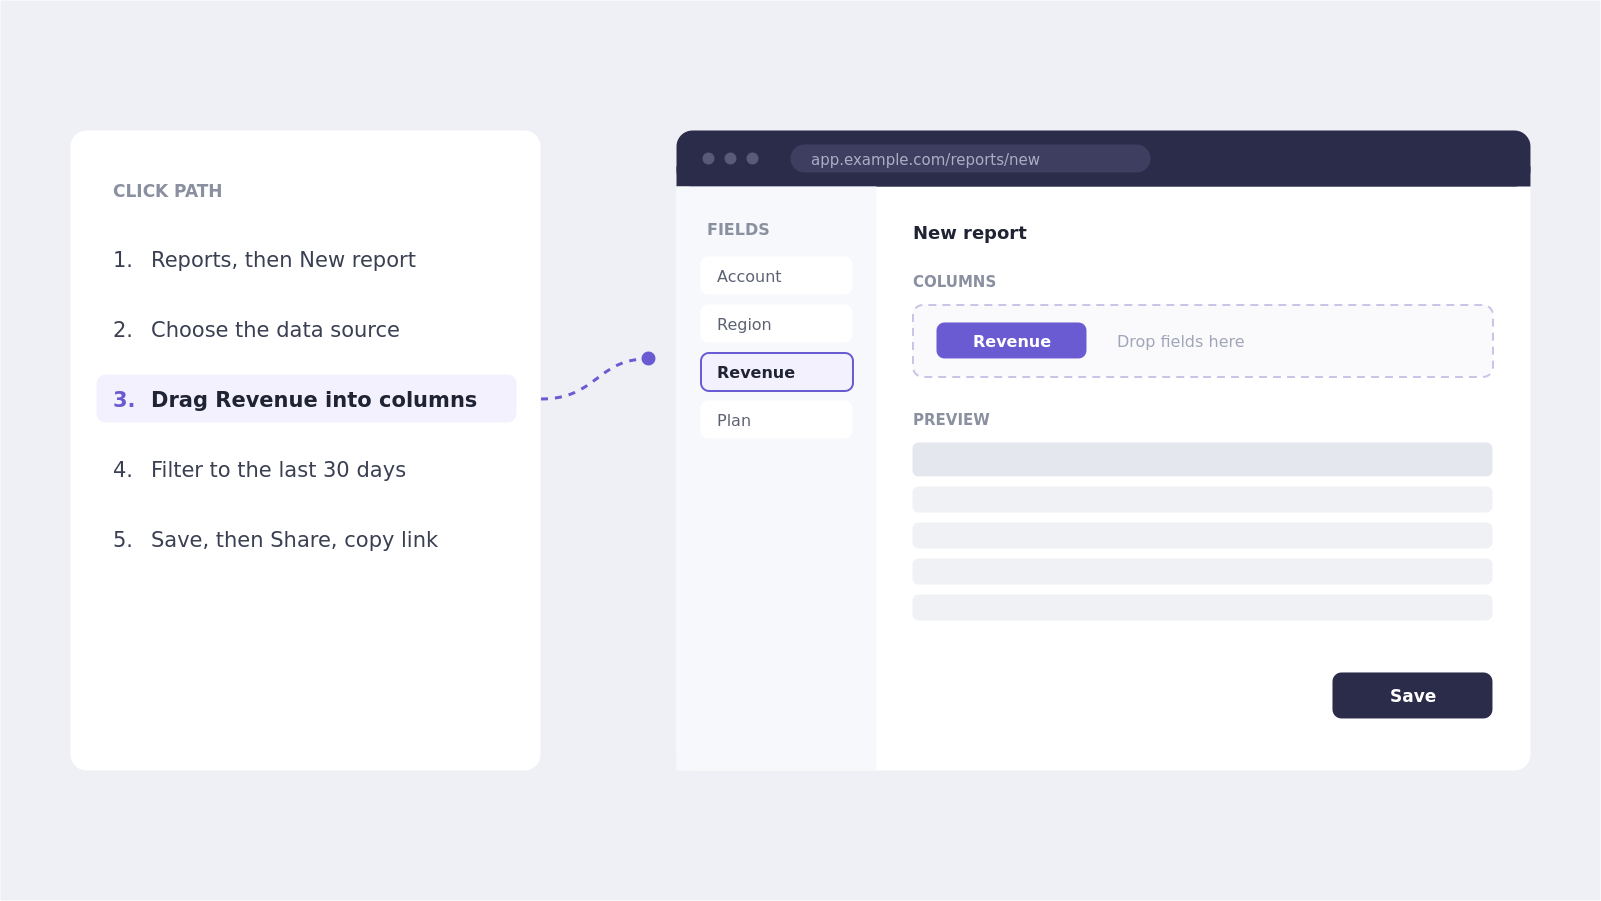
Step 2: Map the Click Path Before You Write Anything
Open a blank note and list the clicks in order. Not sentences. Just the sequence.
- Reports, then New report
- Choose the data source
- Drag Revenue into columns
- Filter to the last 30 days
- Save, then Share, then copy the link
That takes about four minutes and does two things a script cannot. It surfaces dead steps you would otherwise record by accident. It also tells you exactly which demo data to fix first.
Skip the script for now. Writing narration before you record forces you to imagine a workflow you could simply perform. It is the step where most demo videos stall.
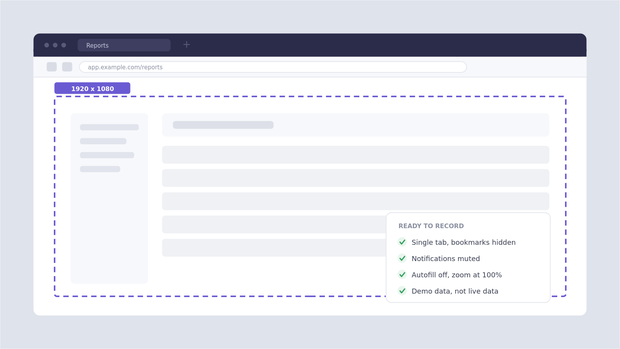
Step 3: Set Up a Clean Recording Environment
Most editing time is spent fixing recording decisions. Ten minutes here removes most of it.
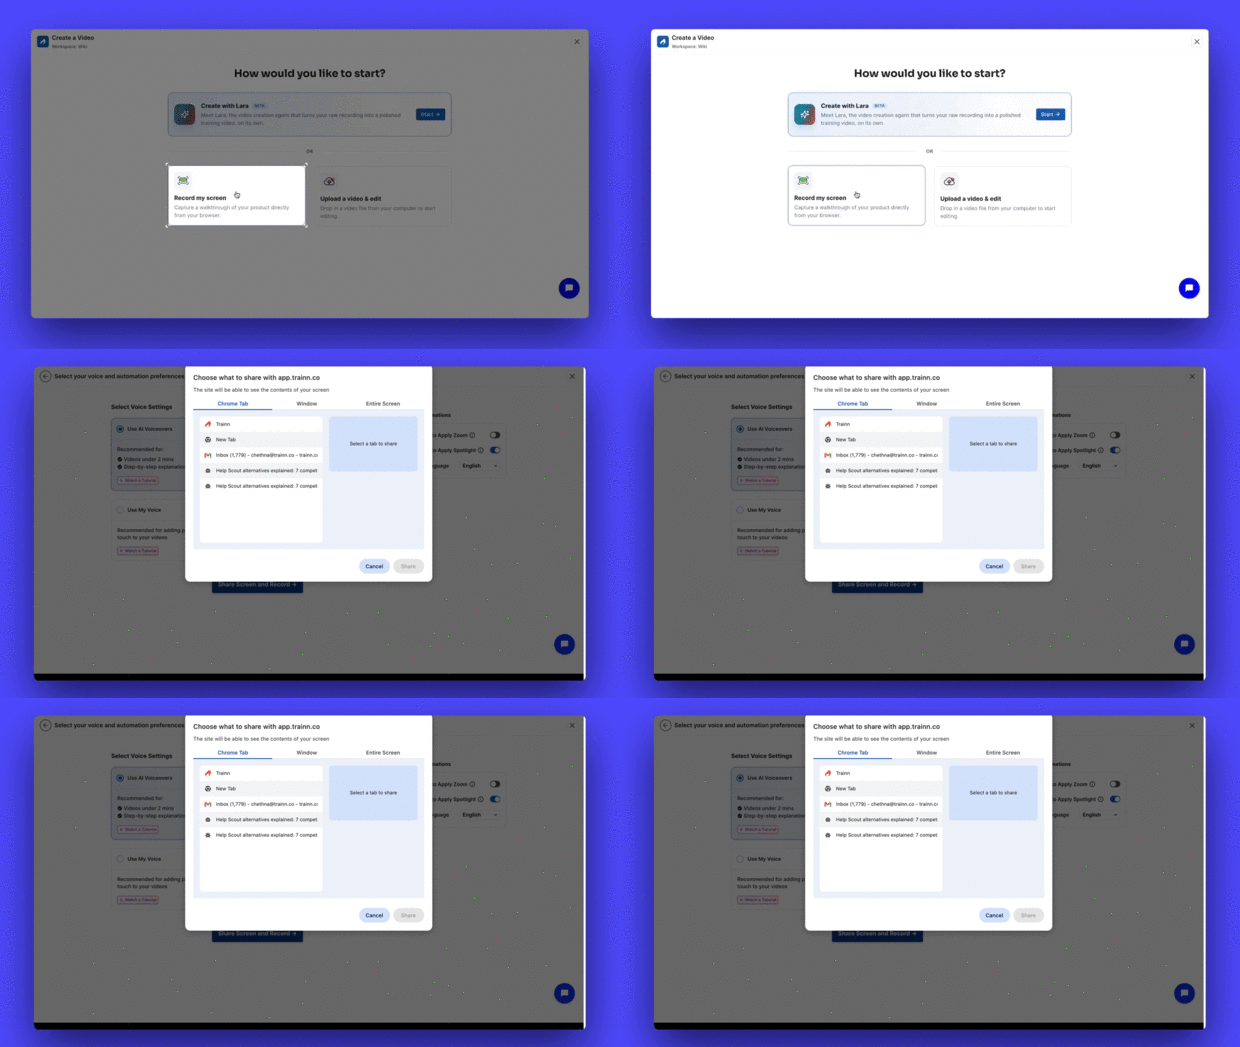
Step 4: Record the Workflow in One Silent Take
Do not narrate while you record. Speaking and clicking at the same time is what forces retakes, because one stumble ruins an otherwise clean capture.
Click through the path with your mouth shut. Move at teaching speed, which is roughly half your working speed. Pause about one second after each meaningful click, and never scroll while you think. Aimless scrolling is the hardest thing to cut cleanly.
If you misclick, keep going. A misclick costs two seconds to trim later. A restart costs the whole take.
End the recording on the payoff screen rather than navigating away from it. That final frame usually becomes your thumbnail.
One note on desktop software. Browser recording allows richer automation, because the recorder can read the interface. Desktop capture is full screen, so plan a tighter click path and expect fewer automatic effects.
Step 5: Add Narration, Zooms, and Branding
Now write the words, with the recording in front of you. One line per step. Say what the viewer is about to see, not what they just saw.
Cut every sentence that describes the interface, such as "now I'll click the blue button in the top right." Replace it with the reason: "filter to the last 30 days so the report matches your billing cycle."
Then add the production layer. Zooms on the field being filled, spotlights on meaningful clicks, subtitles, and your brand colors, intro, and outro.
This is the step that decides whether the video ships. Done by hand it means a timeline editor, keyframes, and a separate voiceover tool.
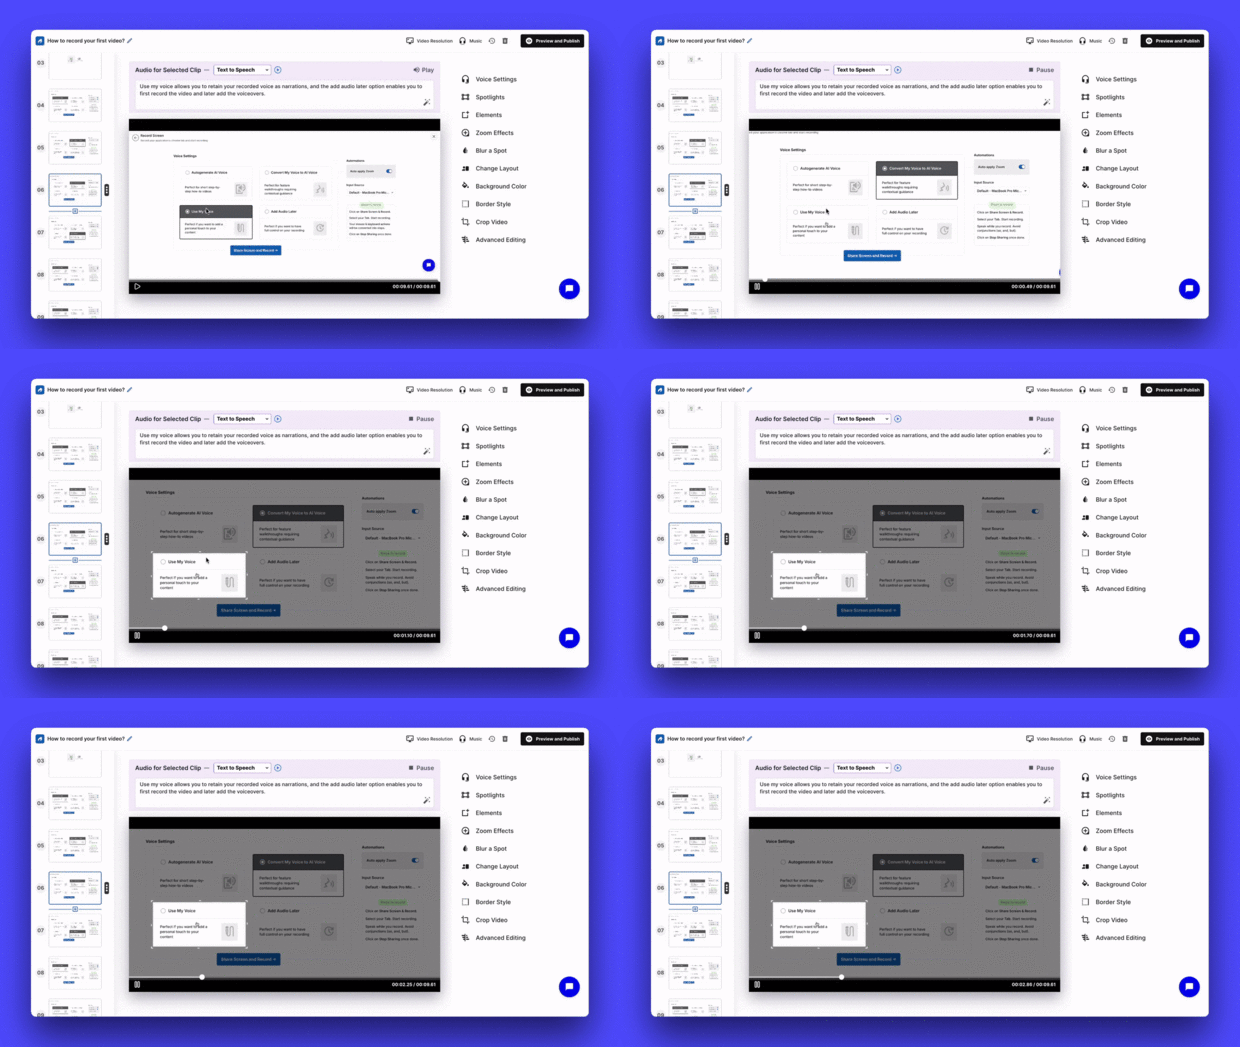
Trainn's AI video and guide creation tool reads the recording as a workflow rather than a sequence of frames, so the same step runs in four moves. Upload the silent take. Review the script it drafted from your clicks, editing text rather than a timeline. Pick a voice. Check the zooms and spotlights it placed on the meaningful actions.
Brand colors, intro, and outro are set once at the workspace level and applied to every video after that.
Step 6: Publish in the Formats Your Viewers Use
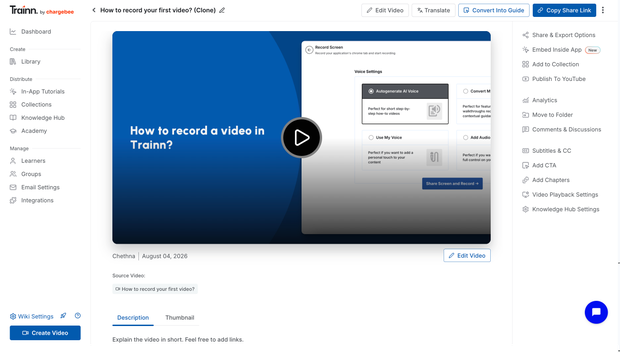
One recording should produce more than one asset. A video for people who watch. A written step-by-step guide for people who skim. An interactive walkthrough for people who want to click through it themselves.
Trainn generates all three from the same silent take, along with one-click translation into 30+ languages. Unlike other creation tools, it also hosts and tracks what you publish, so your demos do not scatter across Vimeo, Google Drive, and email.
Then place each one where the question actually gets asked. The pricing page for a website demo. The welcome sequence for onboarding. The help center article for a support answer.
Maintain at the clip level. When one screen changes, replace that clip instead of re-recording the video. That is the difference between a library that stays current and one that goes stale two releases after launch.
Avoid Five Mistakes That Sink Demo Videos
The last one is the expensive mistake. A stale demo teaches a workflow that no longer exists, and it generates the support tickets it was meant to prevent.
Some people want timeline-level control over every keyframe, transition, and audio crossfade. If that is the job, Camtasia, Premiere, and DaVinci Resolve are the right tools. Clip-based, text-driven editing is built for people who should not have to edit video at all.
Confirm What You Built
You should now have a demo video scoped to one job, a written guide covering the same steps, and a place for both to live. Teams working this way report large shifts in output. Posist moved from seven days per video to seven videos per day. ServiceNow cut production time 50% and tripled weekly output.
Next, repeat the process for your highest-volume support question. That is usually the demo with the fastest payback.
Frequently Asked Questions
How do you prepare a demo video?
Preparation is three things. Pick the one job the demo will show, list the clicks in order, and set up a demo account with realistic data. Narration is written after recording, not before. Preparing this way usually takes under 10 minutes.
How do you structure a product demo?
Open on the outcome, show the shortest path to it, then close with one next step. Skip the company introduction. A website demo works best between 60 and 90 seconds; a sales follow-up runs two to four minutes.
Can AI create a demo video?
AI cannot perform your workflow, but it can handle everything after the recording. Current tools draft the script from your on-screen actions, generate voiceover, place zooms and spotlights, add subtitles, and apply brand settings. You still record the workflow yourself.
How do you create a demo video for software?
Record the screen rather than filming anything. Software demos need a clean browser or app window, a demo account with realistic data, and a defined click path. Camera, lighting, and microphone advice applies to physical product videos, not software.
How do you make a demo video of your website?
Same workflow, with one change. Record at 1920x1080 and check how the page renders at that width first. Website demos usually show a visitor journey rather than a logged-in workflow, so start from the page a real visitor would land on.
Related Reading
- Product demo video maker (trainn.co/product-demo-video-maker)
- Create a software demo video (trainn.co/create-instructional-videos/software-demo-video)
- Best AI tools to create product videos for software products (trainn.co/product-videos/ai-tools-to-create-product-videos)
- How to turn product updates into feature demo videos (trainn.co/blog/turn-product-updates-into-feature-demo-videos)
Ready to Trainn your customers?
- Create videos & guides
- Setup Knowledge Base
- Launch an Academy

HANDPICKED FOR YOU
Customer Onboarding Video Templates: 5 Scripts and Why Each One Works

Elevate Your Corporate Videos with 7 Captivating Strategies and Real-life Examples (2024)

How to Make an Instructional Video for a Better Customer Experience
Trainn is an AI-powered product video and guide creation platform that turns screen recordings into product demo videos, training videos, onboarding videos, step-by-step guides, and interactive walkthroughs. Trainn also delivers this content externally through a branded no-code LMS, or in-app through embedded tutorials to train customers at scale.

North Bethesda, Maryland 20852


