How to Add the Zendesk Chat Widget to Your Website?
Created with Trainn AI
Here's a step-by-step guide on how to add Zendesk chat widget to your website:
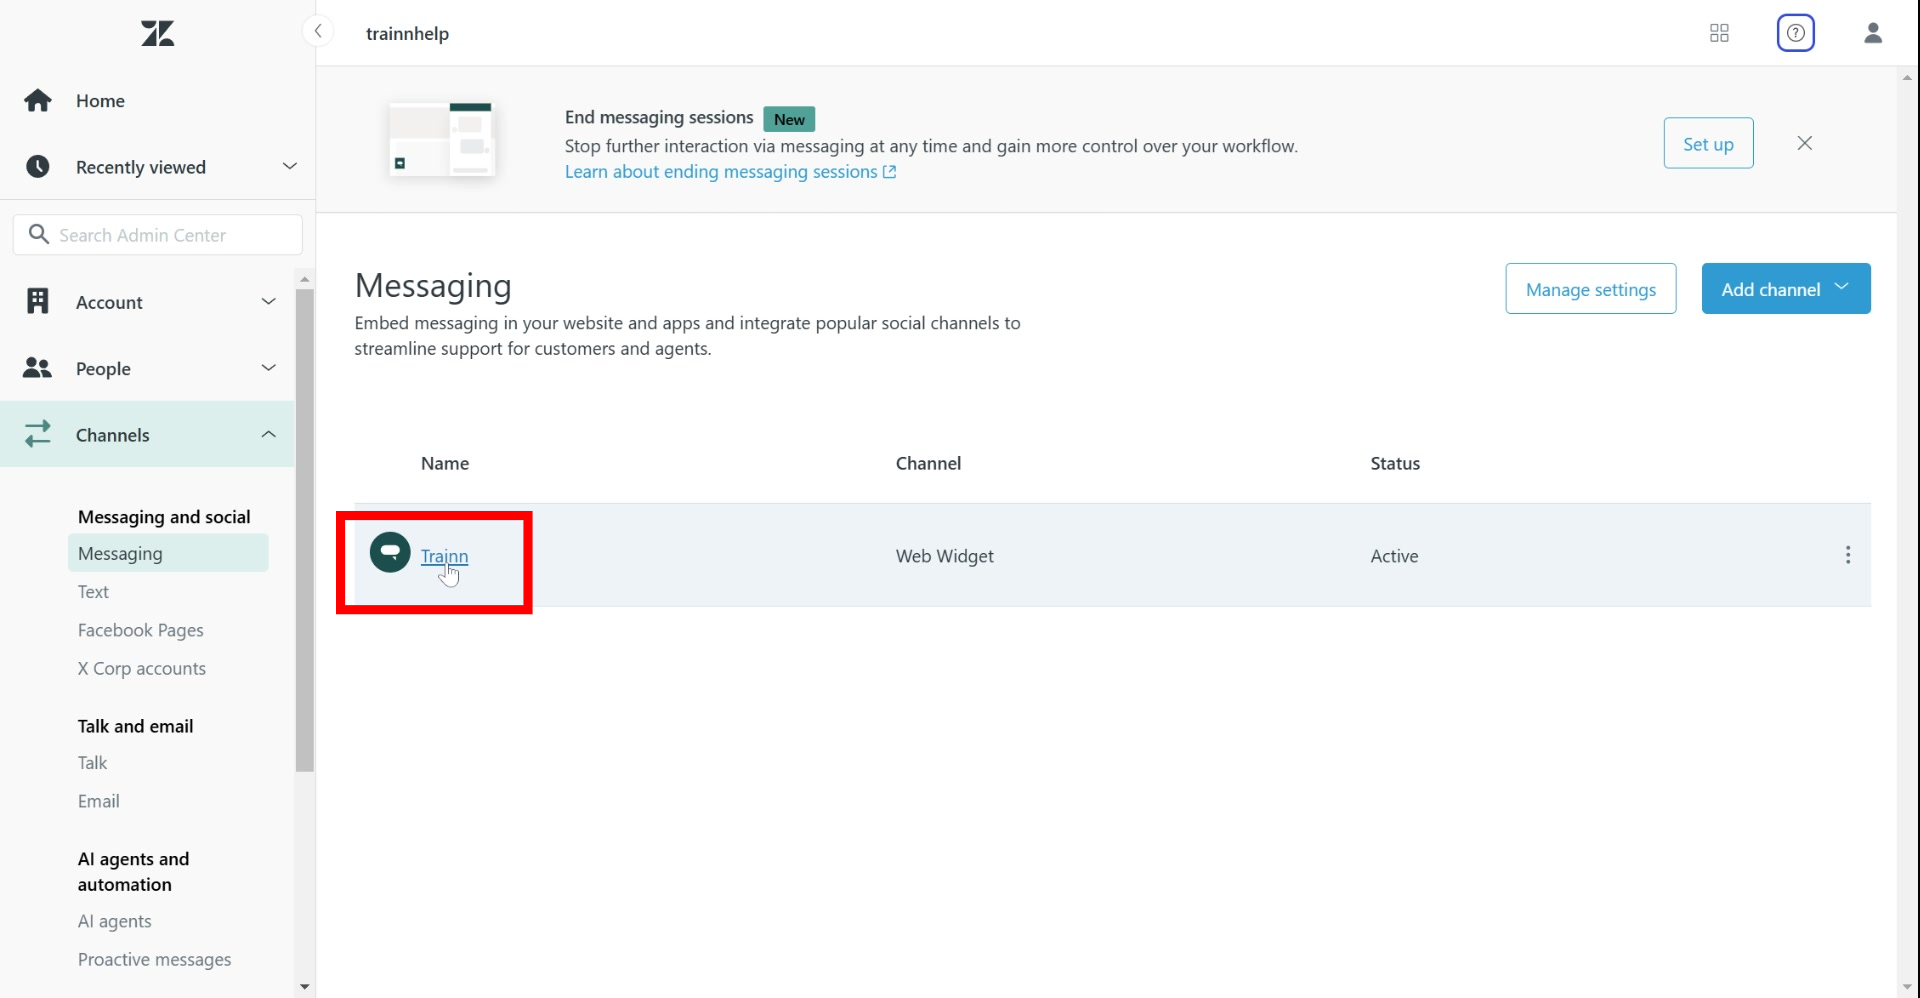
1. In the navigation bar, click on "Channels".

2. Under "Channels," select "Messaging".

3. Click on your Web Widget.

4. Under "Basics", set up a name and channel information.

5. Customize your widget under "Style".

6. Set default responses under "Responses".

7. Configure authentication settings under "Authentication".

8. Copy the widget's HTML code snippet.

9. In the source code of the web page, paste the embed script between the page's head tags.
You can paste it either right after the opening <head> tag or right before the closing </head>.

Congrats! You have successfully added the Zendesk chat widget to your website!


